⚠️ This forum has been restored as a read-only archive so the knowledge shared by the community over many years remains available.
New registrations and posting are disabled.
Joined: Jul 11th, '16, 01:57 Posts: 9 Gender: Are you human?: Yes
Location: Massachusetts, USA
Hey everyone. I just completed my indoor aquaponics system.
So I have been working on my indoor aquaponics system for a couple of months now and just finally got it finished, well at least functional for now and I will worry about aesthetics later.
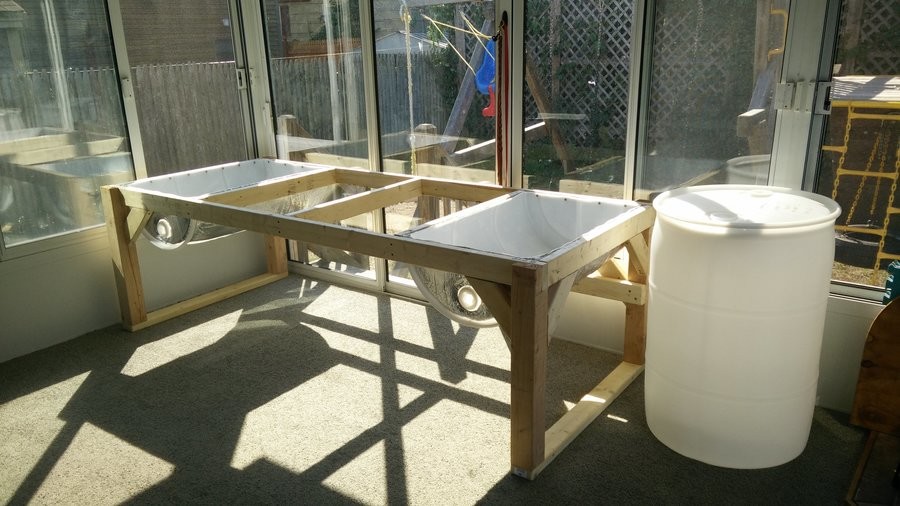
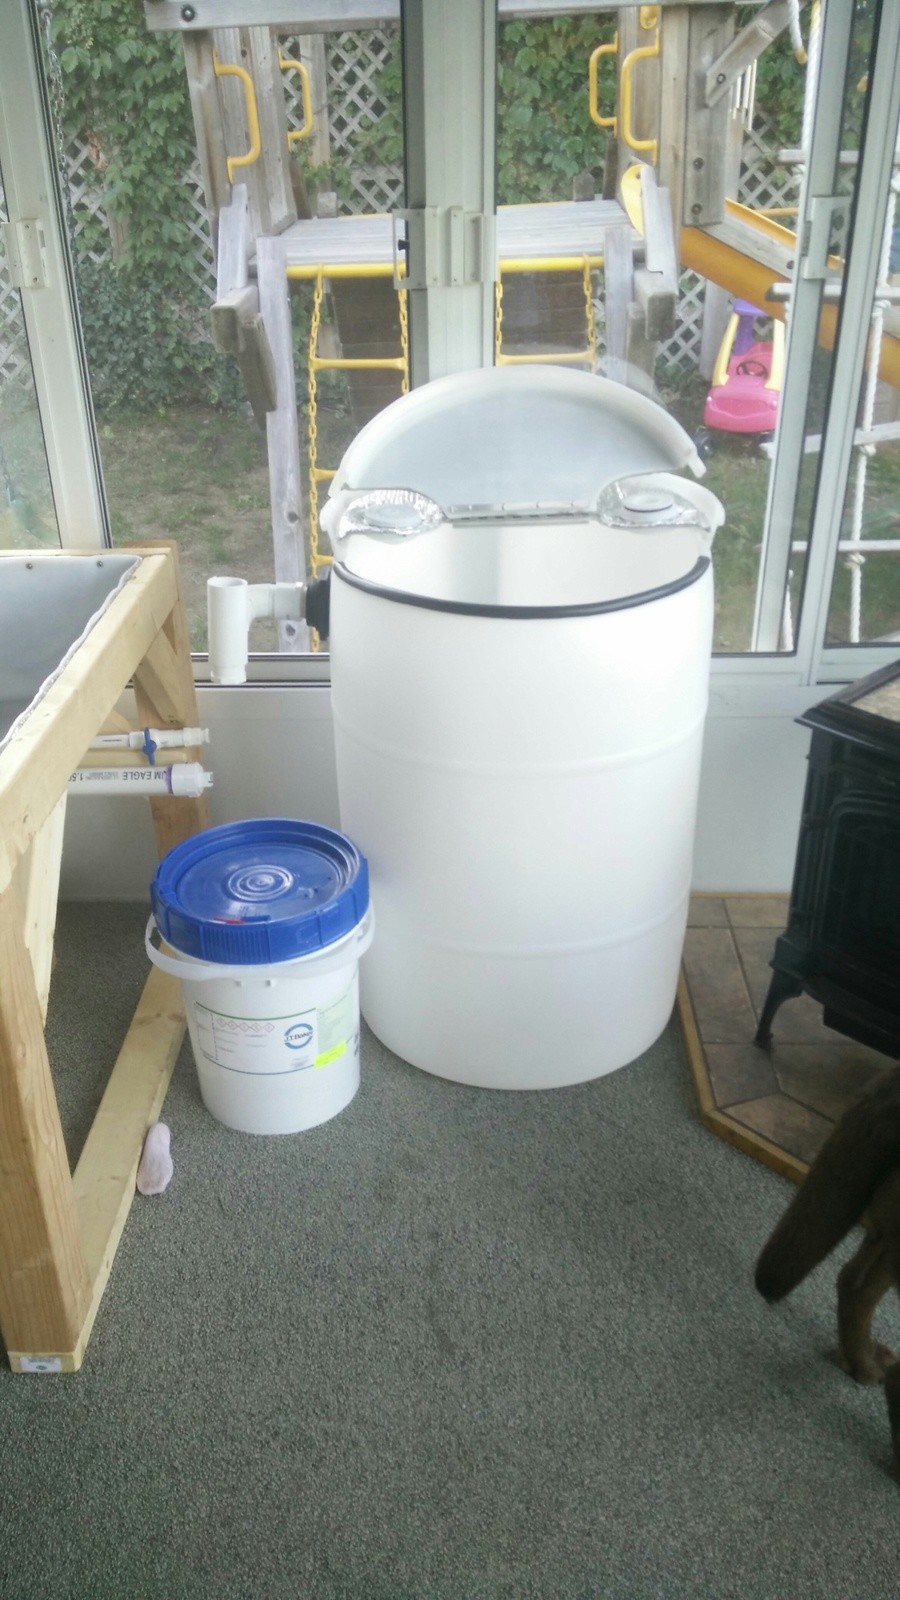
What I have here is a system built utilizing 55 Gallon Drums. My wife gets me these from her job at the biopharmaceutical manufacturing plant.
Well, onto the video as it says a lot more about the system.
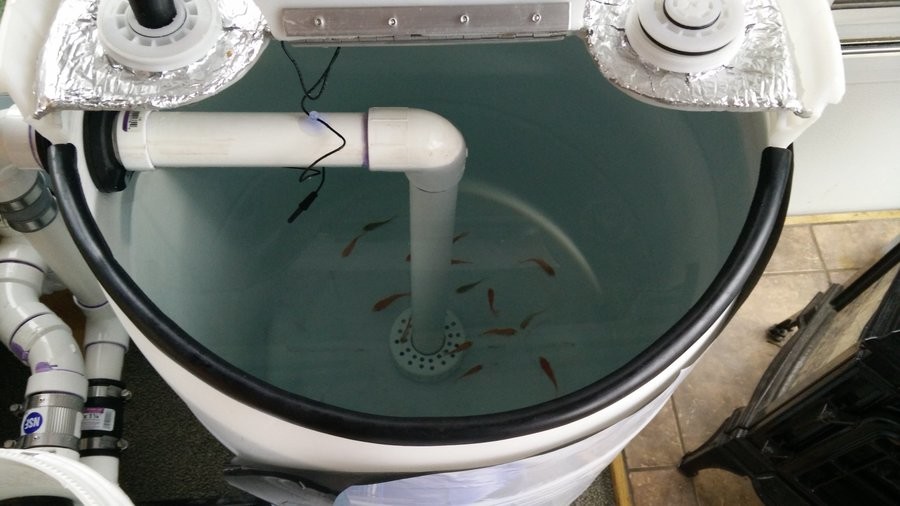
For this system, I am using some little feeder goldfish to start my system. After the system becomes kinda stabilized I will then switch over to trout so we can get fish to eat from the system as well.
Joined: Dec 1st, '15, 11:54 Posts: 528 Gender: Are you human?: YES
Location: Guanacaste, Costa Rica
DeadlyFoez,
DeadlyFoez wrote:
Hey everyone. I just completed my indoor aquaponics system. [ ... ] For this system, I am using some little feeder goldfish to start my system. After the system becomes kinda stabilized I will then switch over to trout so we can get fish to eat from the system as well.
Wow! Quite a pretty and tidy system you've built!
I'd be a bit worried about room in the Fish Tank for trout as they grow out, but maybe others have successfully raised trout in tanks that size?
Joined: Jul 11th, '16, 01:57 Posts: 9 Gender: Are you human?: Yes
Location: Massachusetts, USA
nosliwmas wrote:
DeadlyFoez,
DeadlyFoez wrote:
Hey everyone. I just completed my indoor aquaponics system. [ ... ] For this system, I am using some little feeder goldfish to start my system. After the system becomes kinda stabilized I will then switch over to trout so we can get fish to eat from the system as well.
Wow! Quite a pretty and tidy system you've built!
I'd be a bit worried about room in the Fish Tank for trout as they grow out, but maybe others have successfully raised trout in tanks that size?
Your system really looks lovely...
-- Sam
Thank you for your kind words. If others agree on the trout then maybe i will wait until i get my two 275 gallon IBC tanks going for my greehouse aquaponics system that i plan to do next year.
Joined: Aug 10th, '16, 21:10 Posts: 805 Location: Outer Eastern Melbourne Gender: Are you human?: YES
Location: Australia Victoria Healesville
What a great idea, keep the dirty kids outside and the clean fish AP system inside! Your trout will need more maneuvering room and volume so I agree with getting the IBC online ASAP.
Joined: Aug 10th, '16, 21:10 Posts: 805 Location: Outer Eastern Melbourne Gender: Are you human?: YES
Location: Australia Victoria Healesville
You can pump from your ST into the IBC FT up the SLO them back to the GBs if the outlet of the SLO is higher than the GB valve. It certainly takes up a lot of space and if you want trout you'll want it in a cool place. See "Pete's first system" for pics.
Joined: Jul 11th, '16, 01:57 Posts: 9 Gender: Are you human?: Yes
Location: Massachusetts, USA
UPDATE!
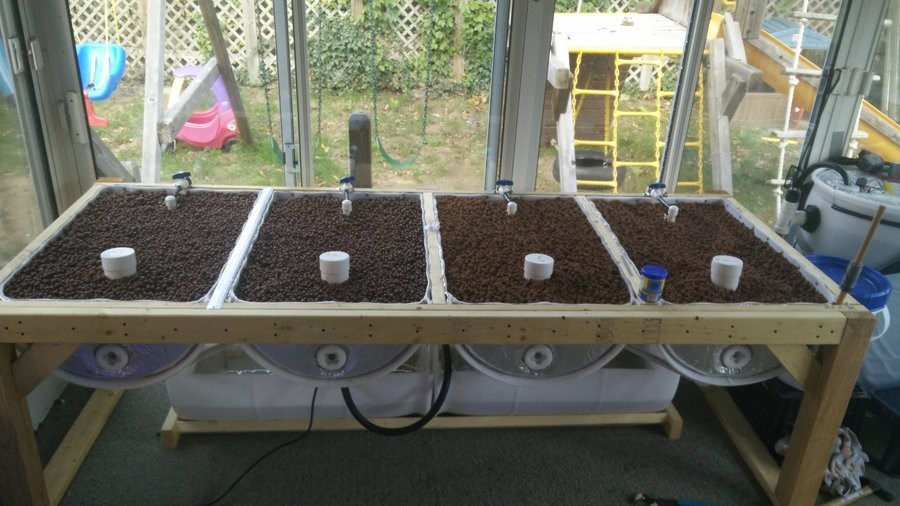
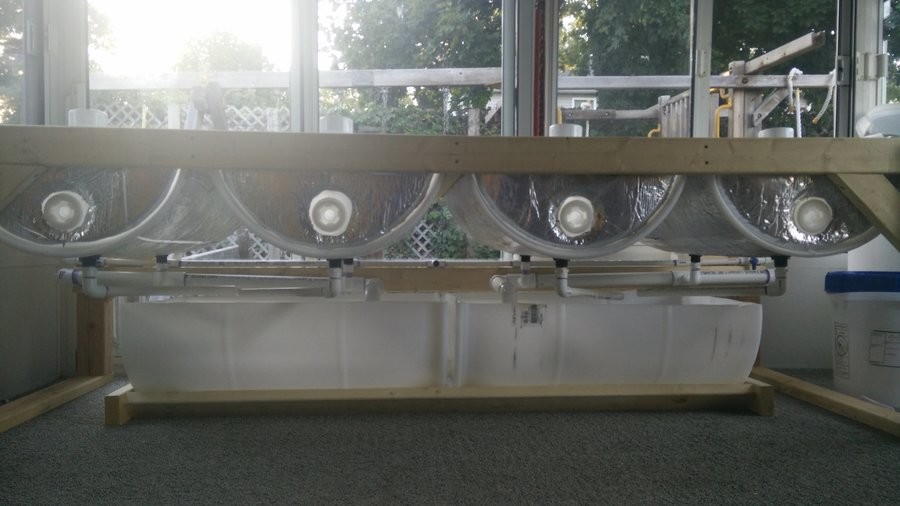
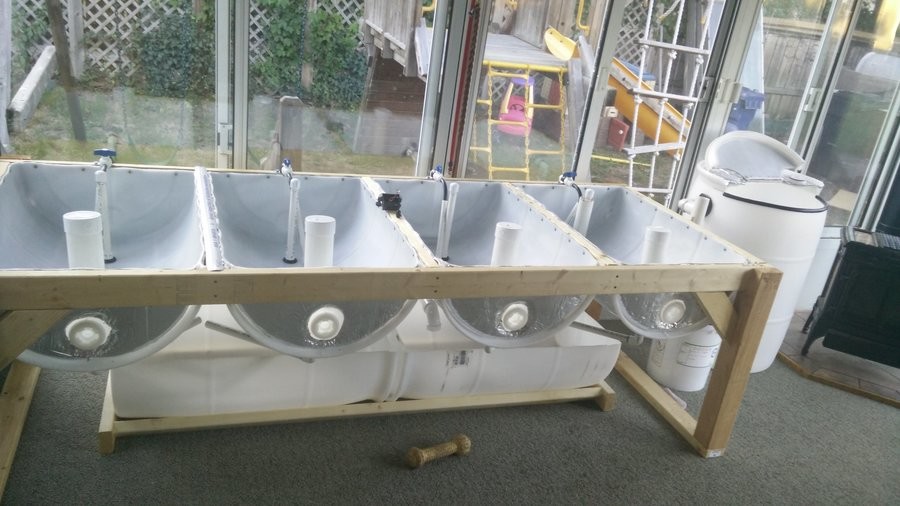
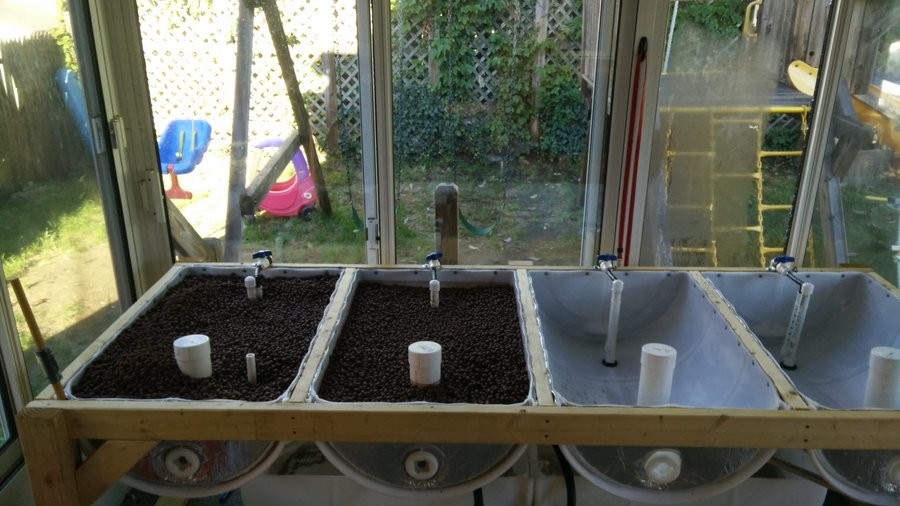
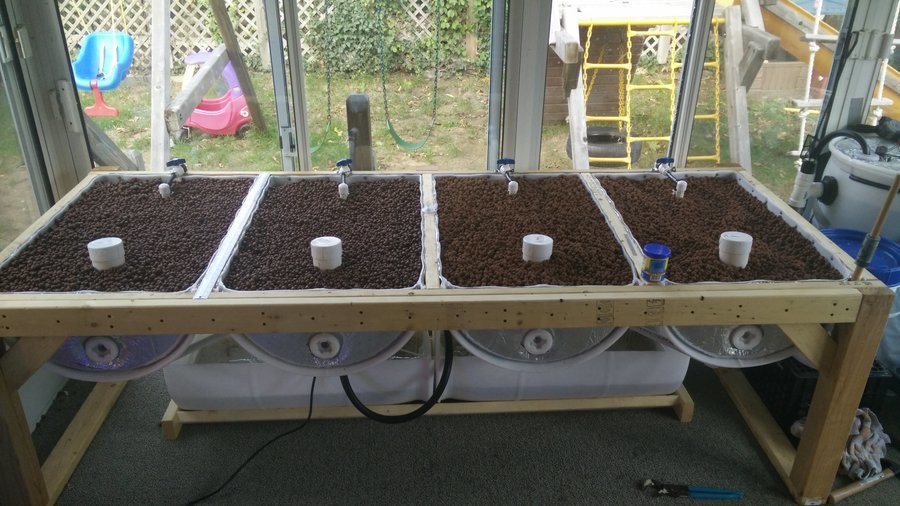
Starting off in this system is about 16 feeder goldfish. It will be at least another month before I can add plants to the grow beds. The grow beds themselves are just 55 gallon drums that I cut in half with a sawzall. I then went around the edges with a file and a belt sander get take down the roughness. I then went around all the edges with a torch to really smooth the edges out a bit more, mostly for my own personal satisfaction.
The frame is constructed mostly with 4x4's and 2x4's. The barrels hang from the frame with some screws.
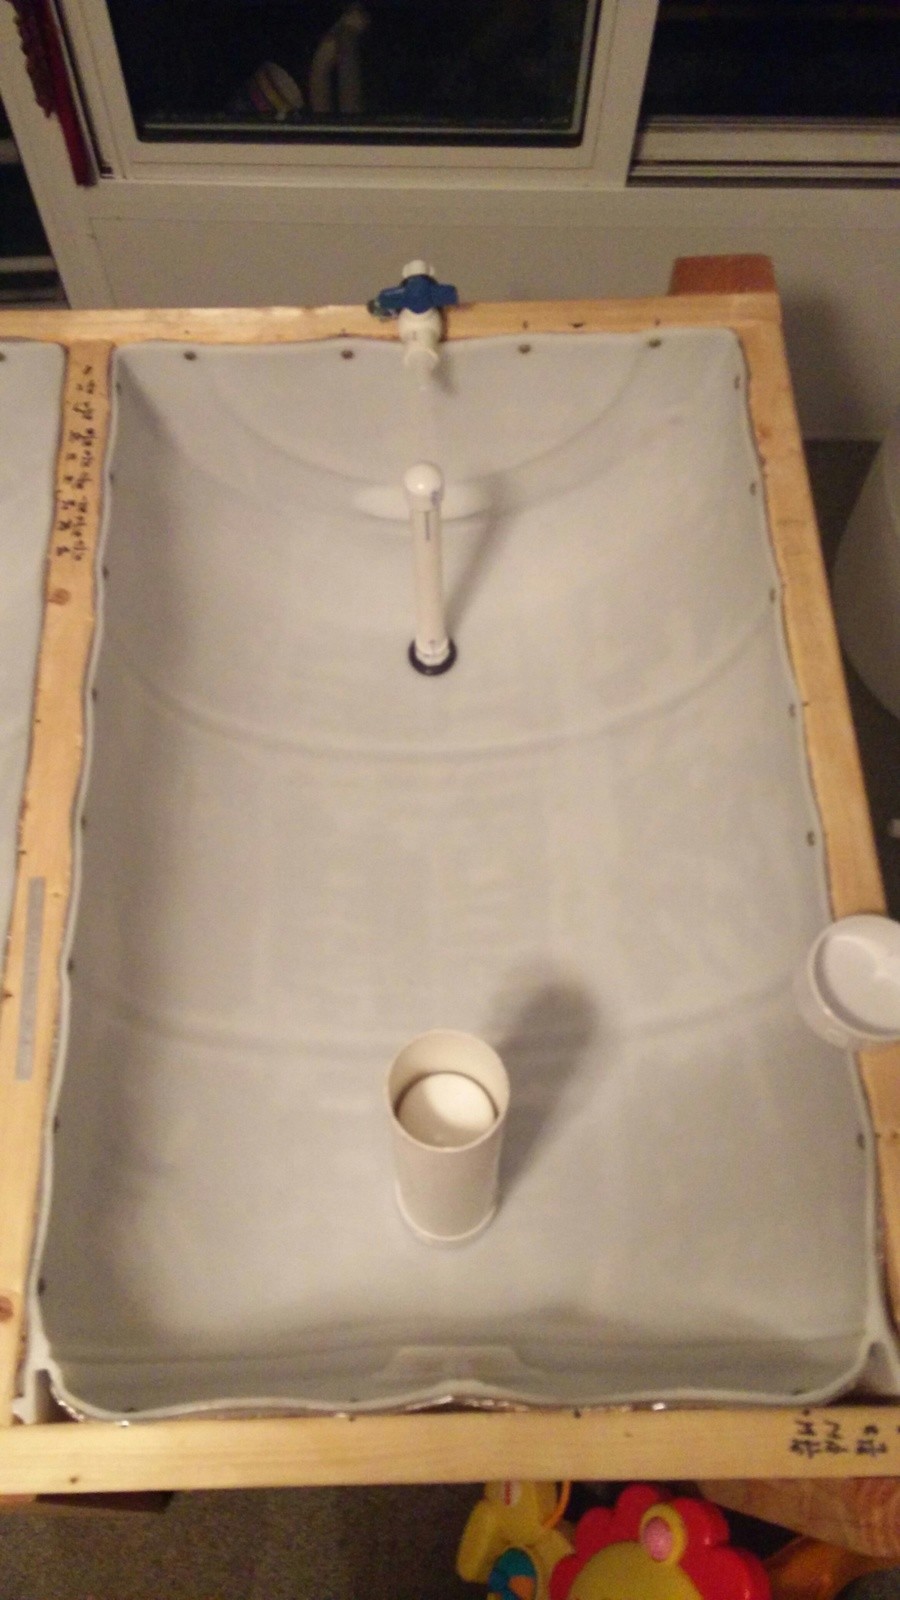
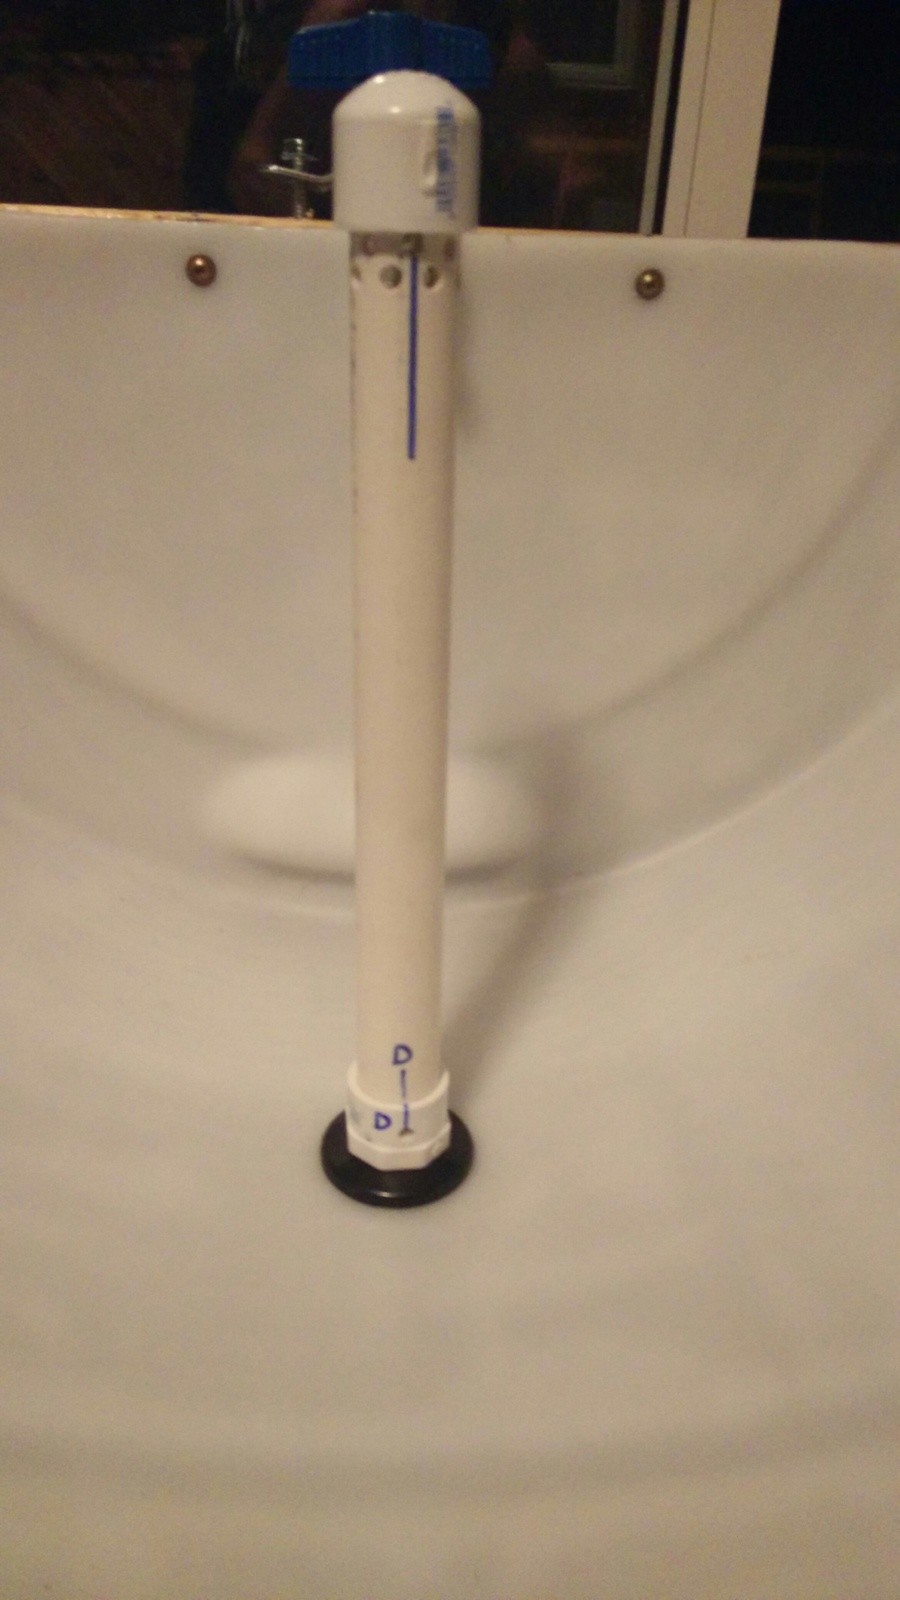
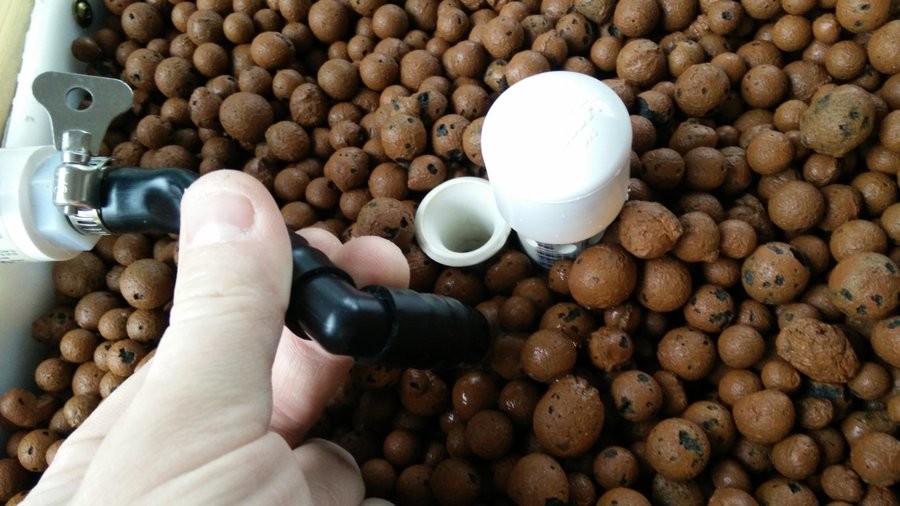
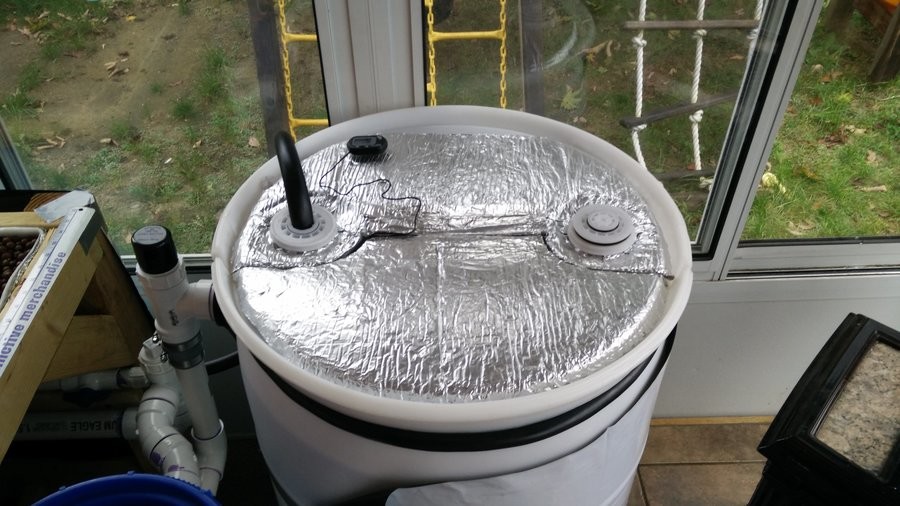
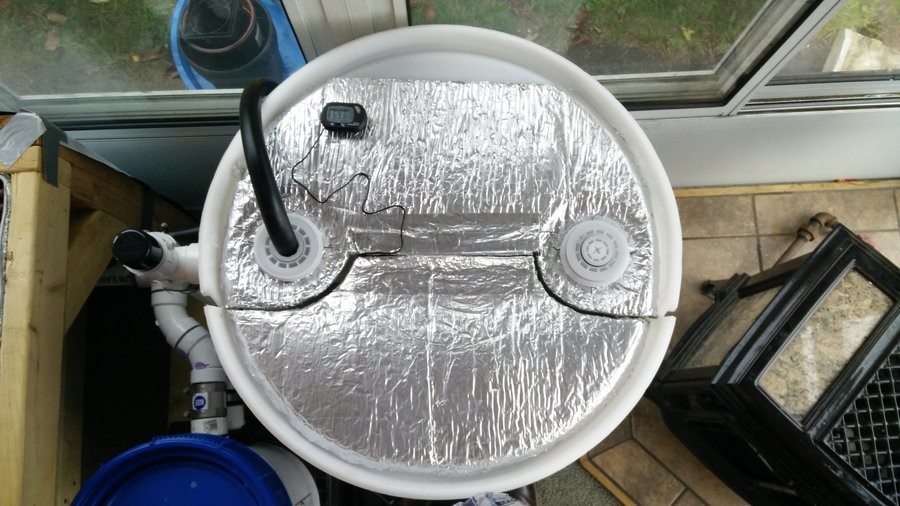
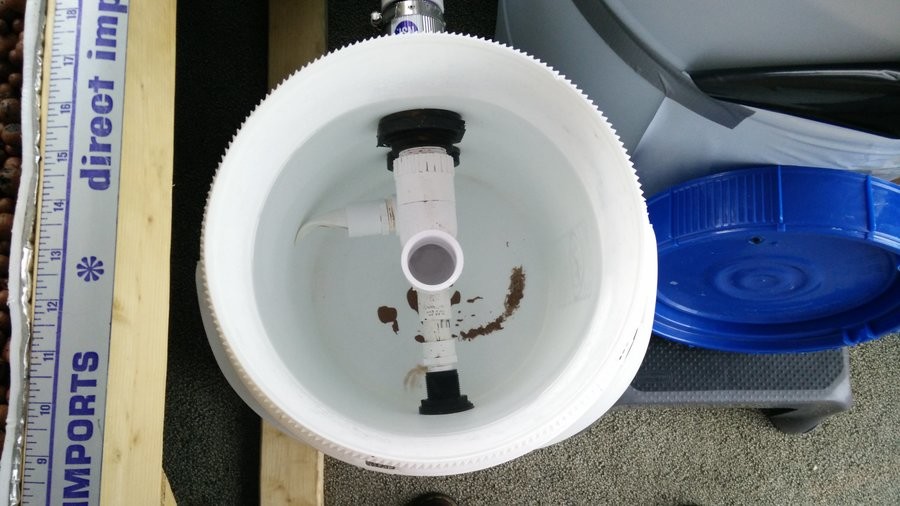
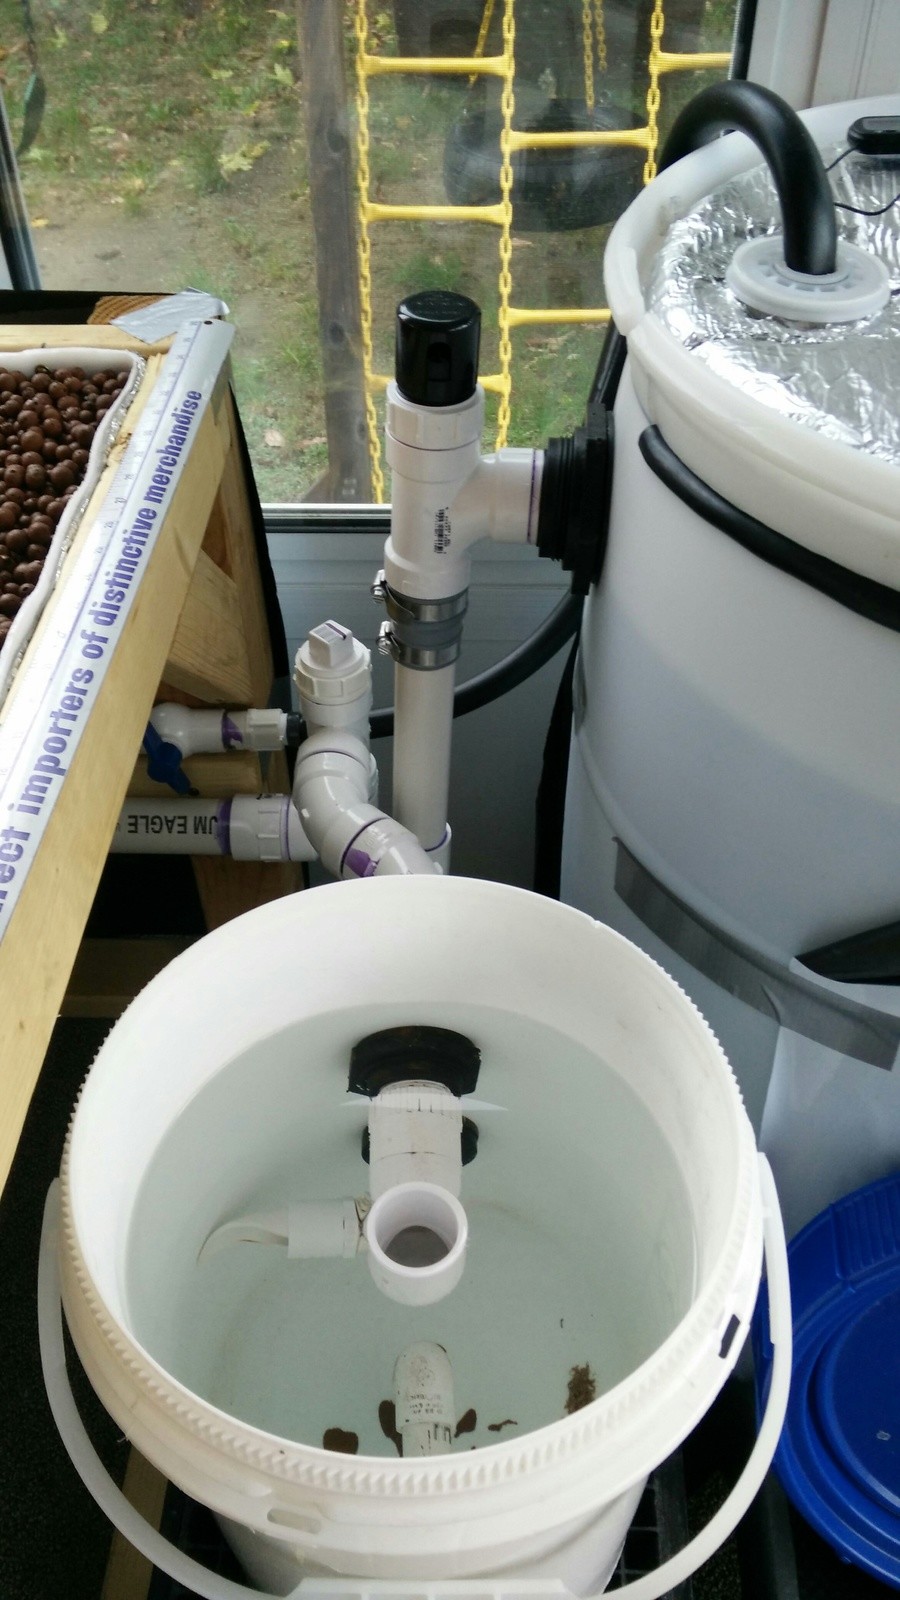
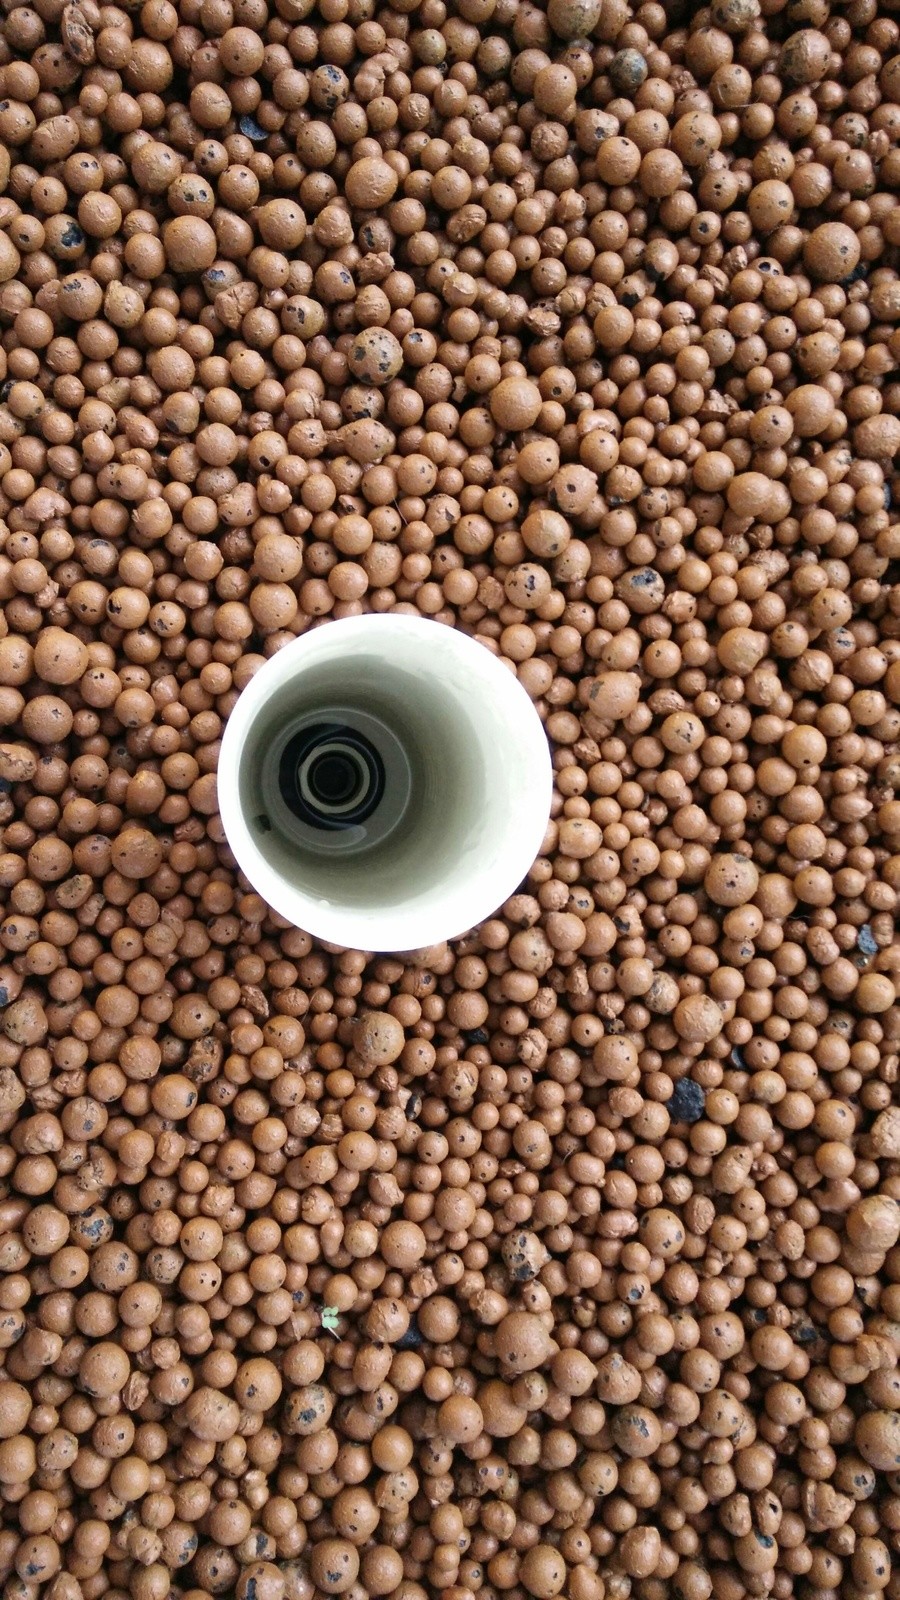
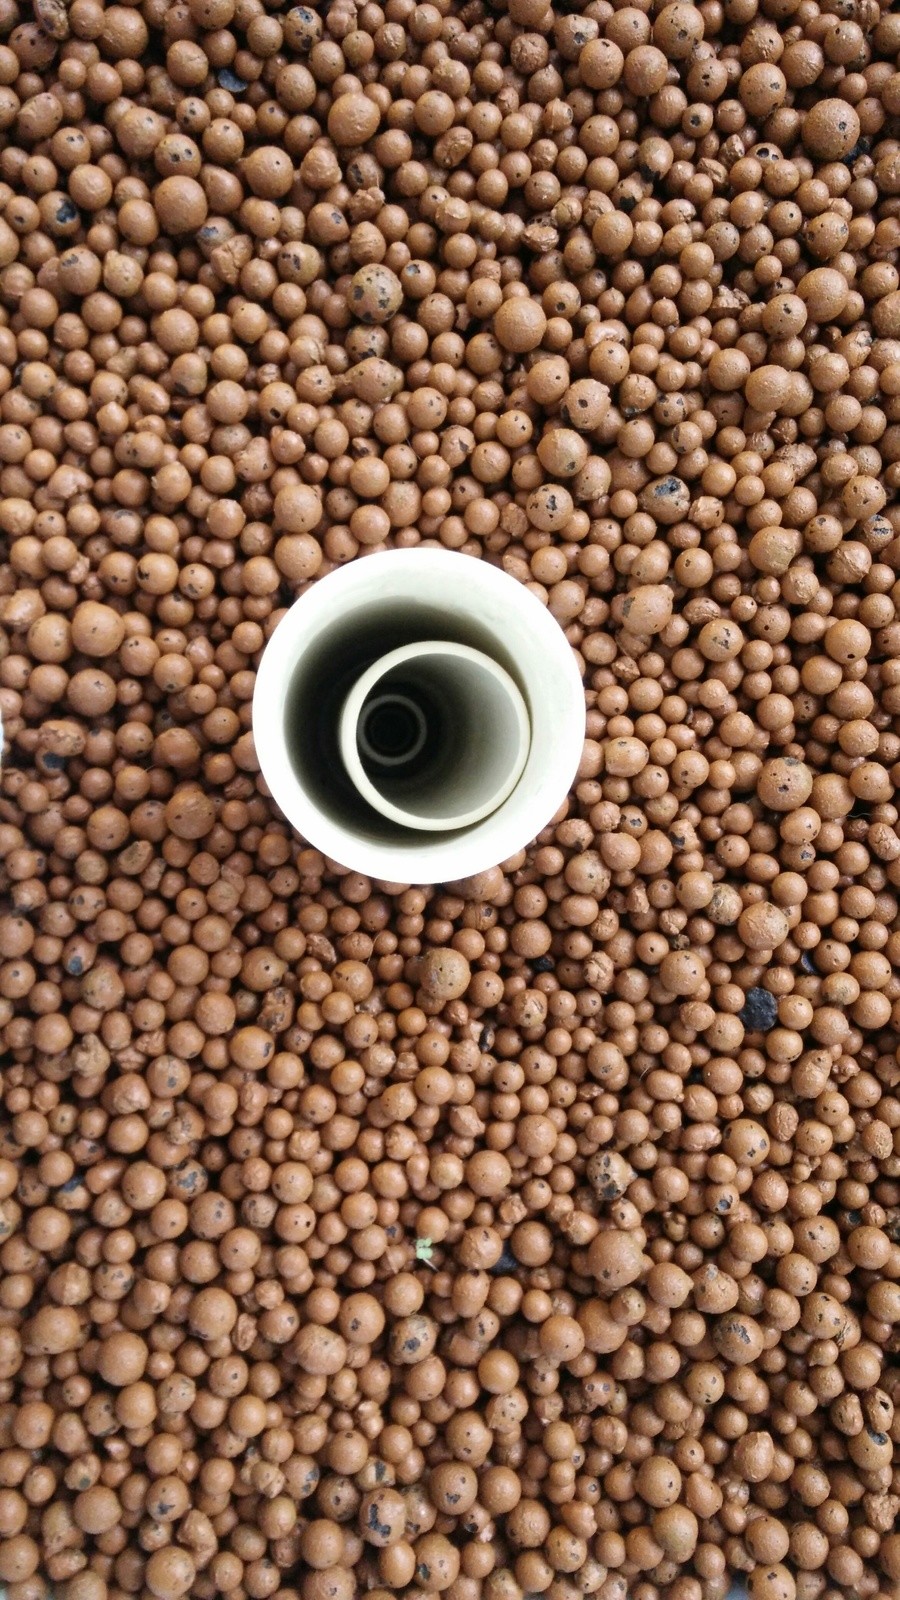
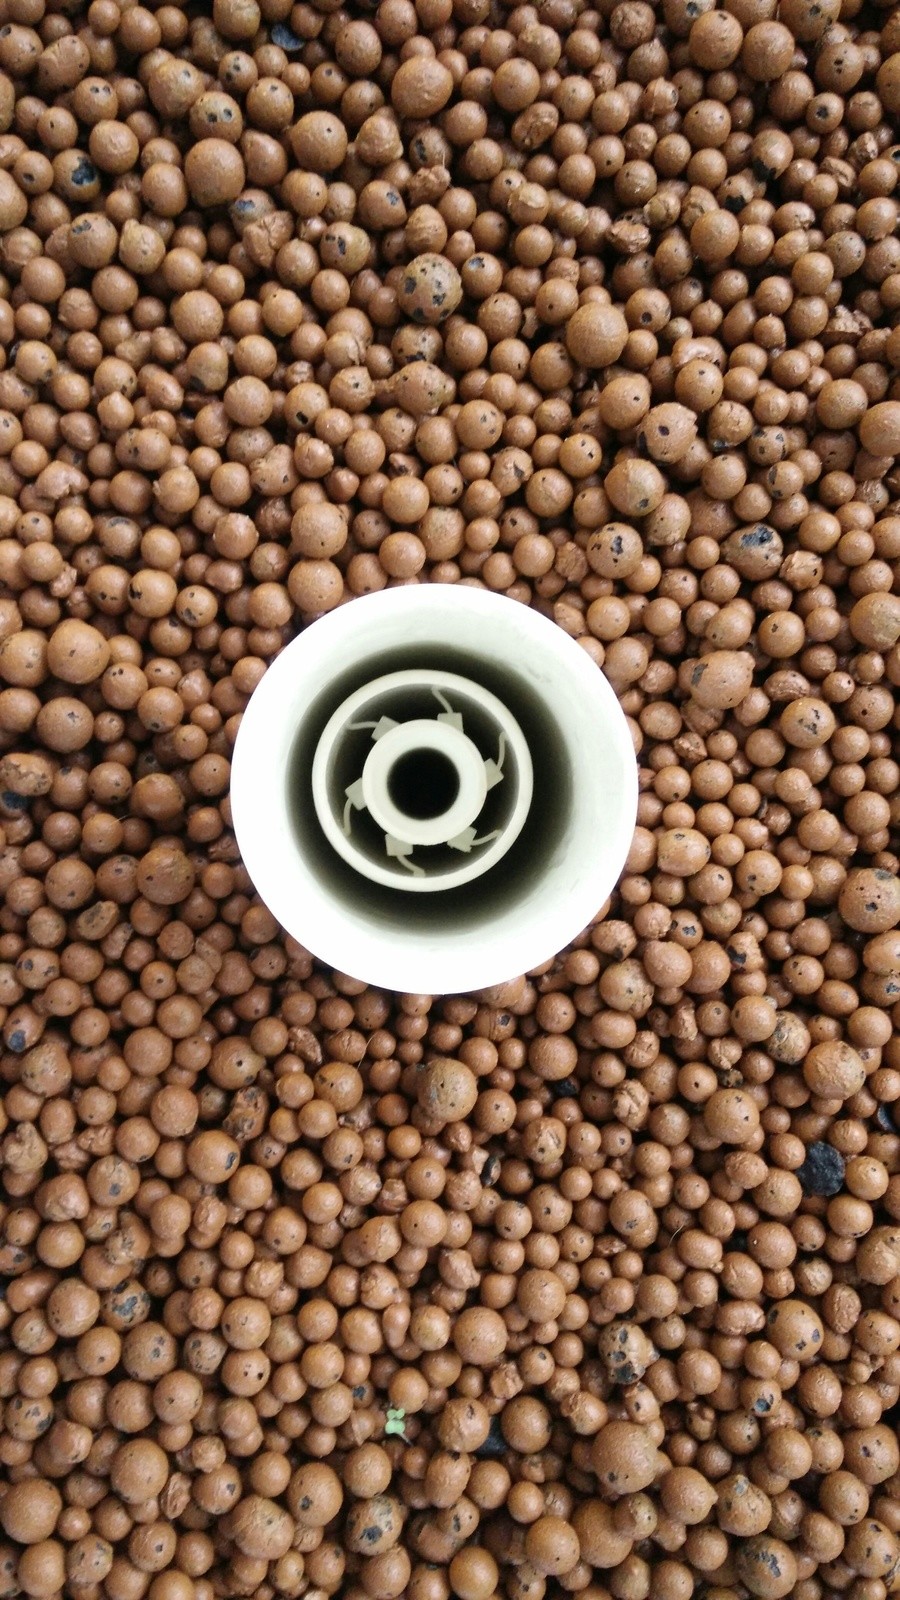
I covered the barrels with Frost King self adhesive foil lined foam insulation. I used that stuff for a few reasons. The first is as insulation to help regulate temperatures. The other big reason was to prevent light leaking into the buckets because that would allow algae to grow which would use up the nutrients that could otherwise go to my plants. Each grow bed has two 3/4" bulkhead fittings going through the bottom of the grow beds. One is for the bell siphon (I will explain that a little later), the other one (pic below) is on the opposite end and that is for an emergency overflow and it also has a slow drain to it in case the pump fails or we lose power and the grow beds are half full, they will slowly drain so my roots dont just sit in standing water would could eventually cause root rot. Behind the emergency drain pipe I have the fill pipe. In the two pictures above I have the clay pellets in the grow beds. The fill pipe is quite simple. It is a bout a 8" length of 1/2" PVC that I flared out the top and then drilled holes almost the whole length of it. This fill pipe is zip tied to the emergency drain pipe.
There is only one real purpose for this "Fill Pipe" and that is just to give the water a direct place to go to fill the grow bed. Most other people I have seen just have the water splashing on the top of their grow media and it eventually grow a lot of algae there. I am trying to minimize it with this idea. You can see this in action in the video that I posted up in my last post.
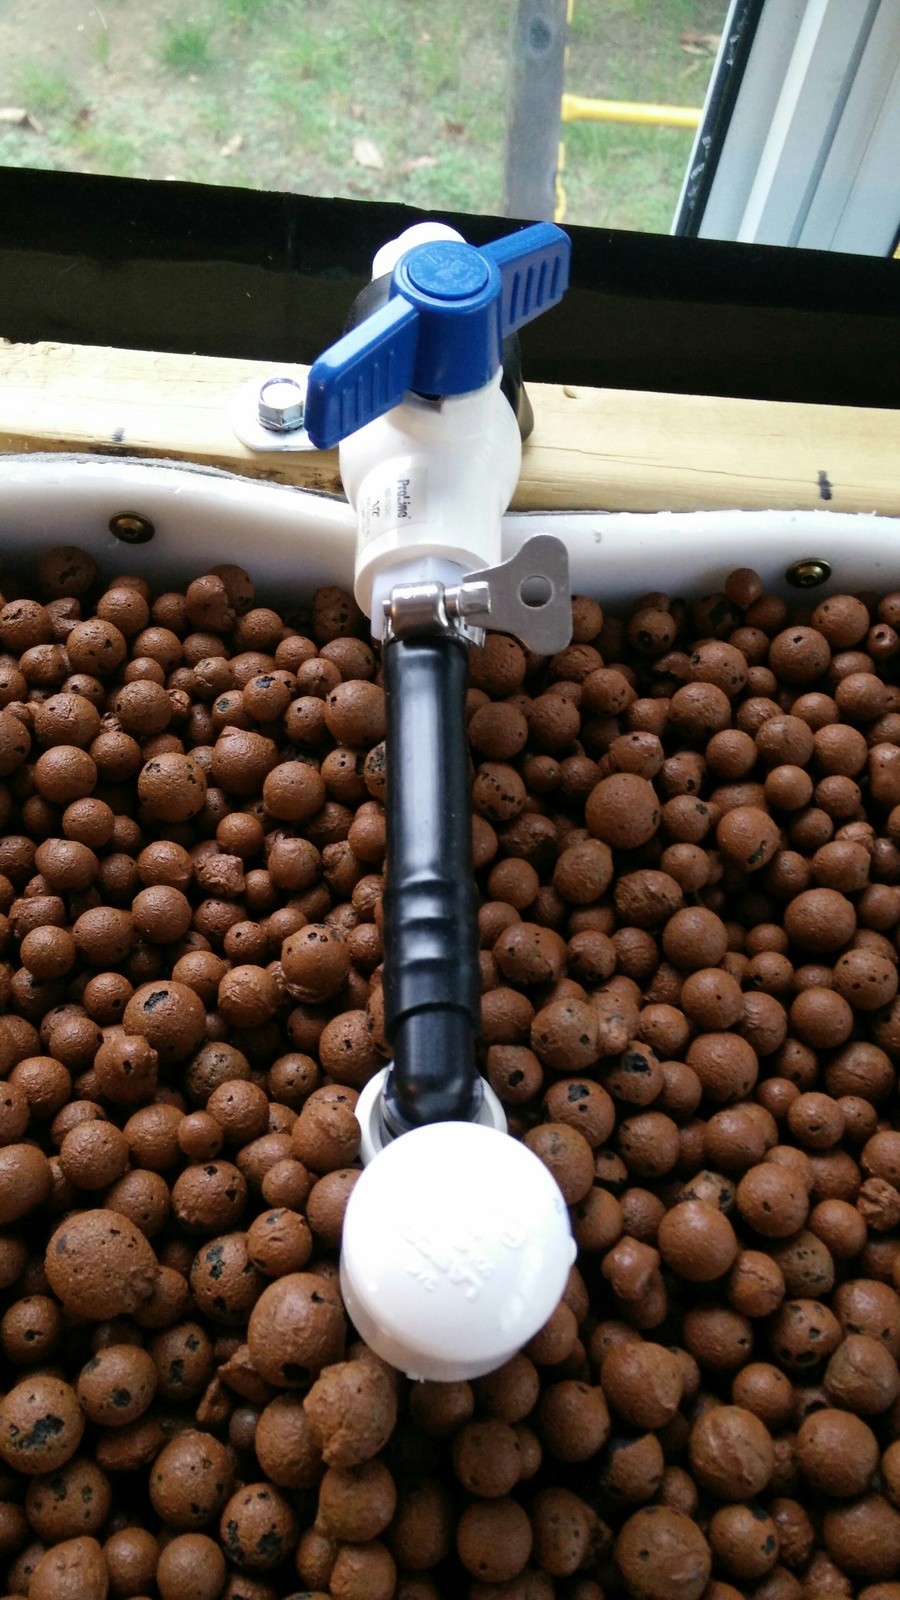
As you can see in the pictures above, the water is actually coming in from where that valve is, flows through the flexible black tube, and then into the "Fill Pipe". I used the flexible black tubing so I could remove it from the fill pipe and look at the flow rate of the liquid coming out. The flare on the PVD fill pipe is so I can more easily insert the black tube and elbow piece easily into the fill pipe.
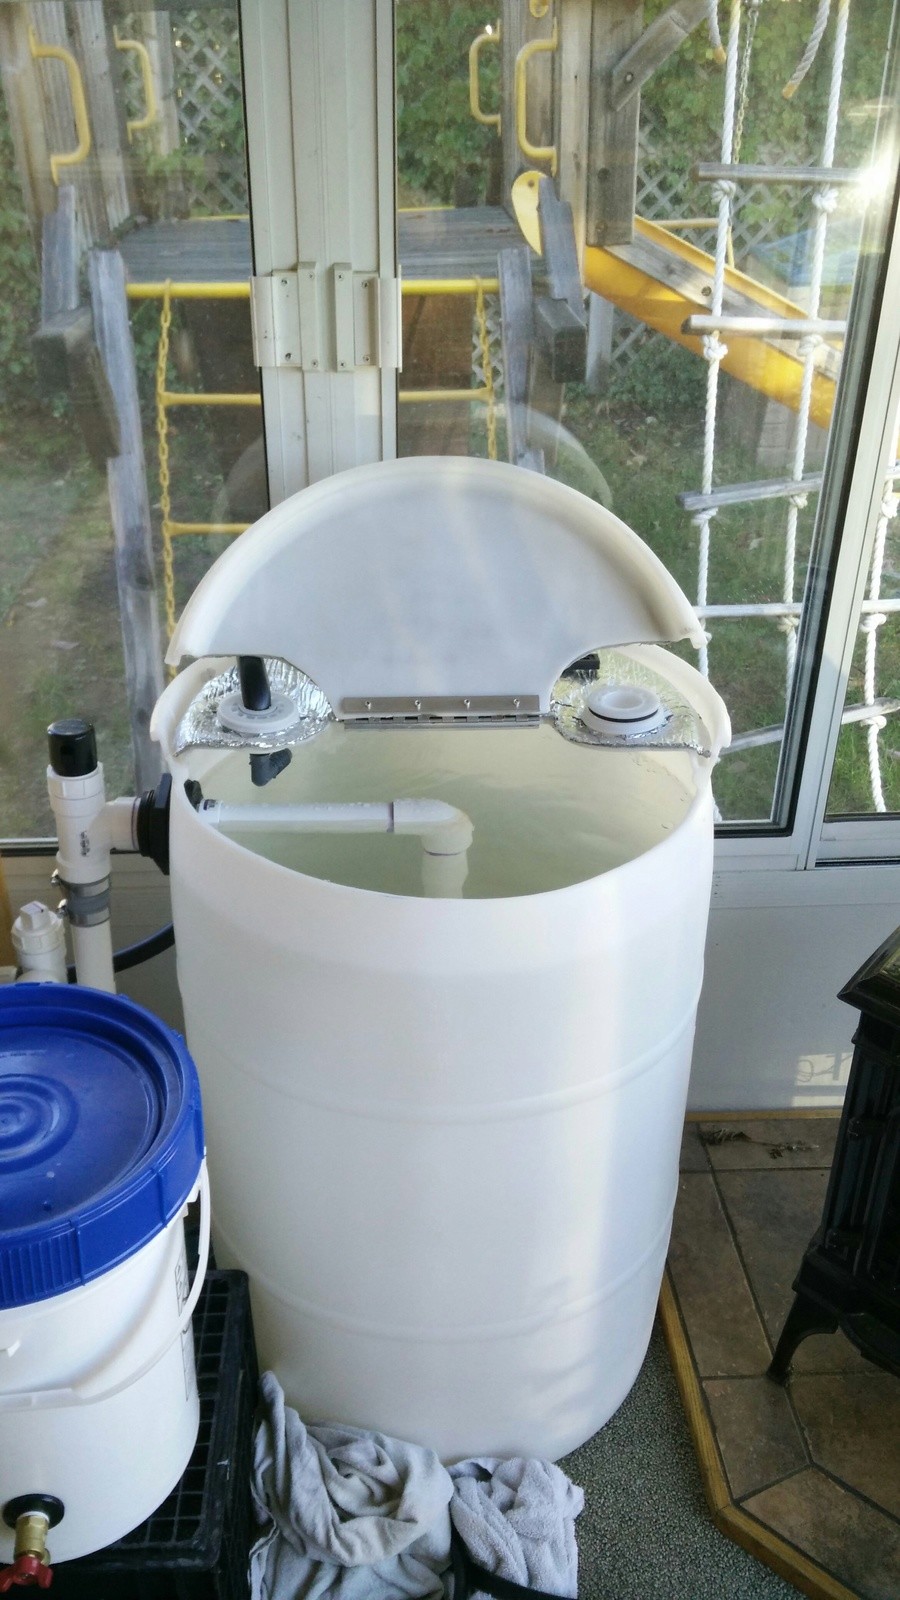
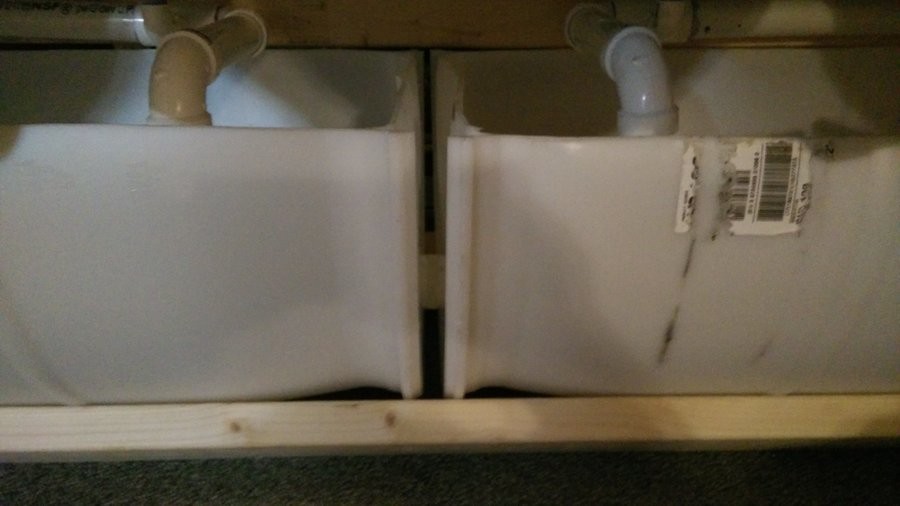
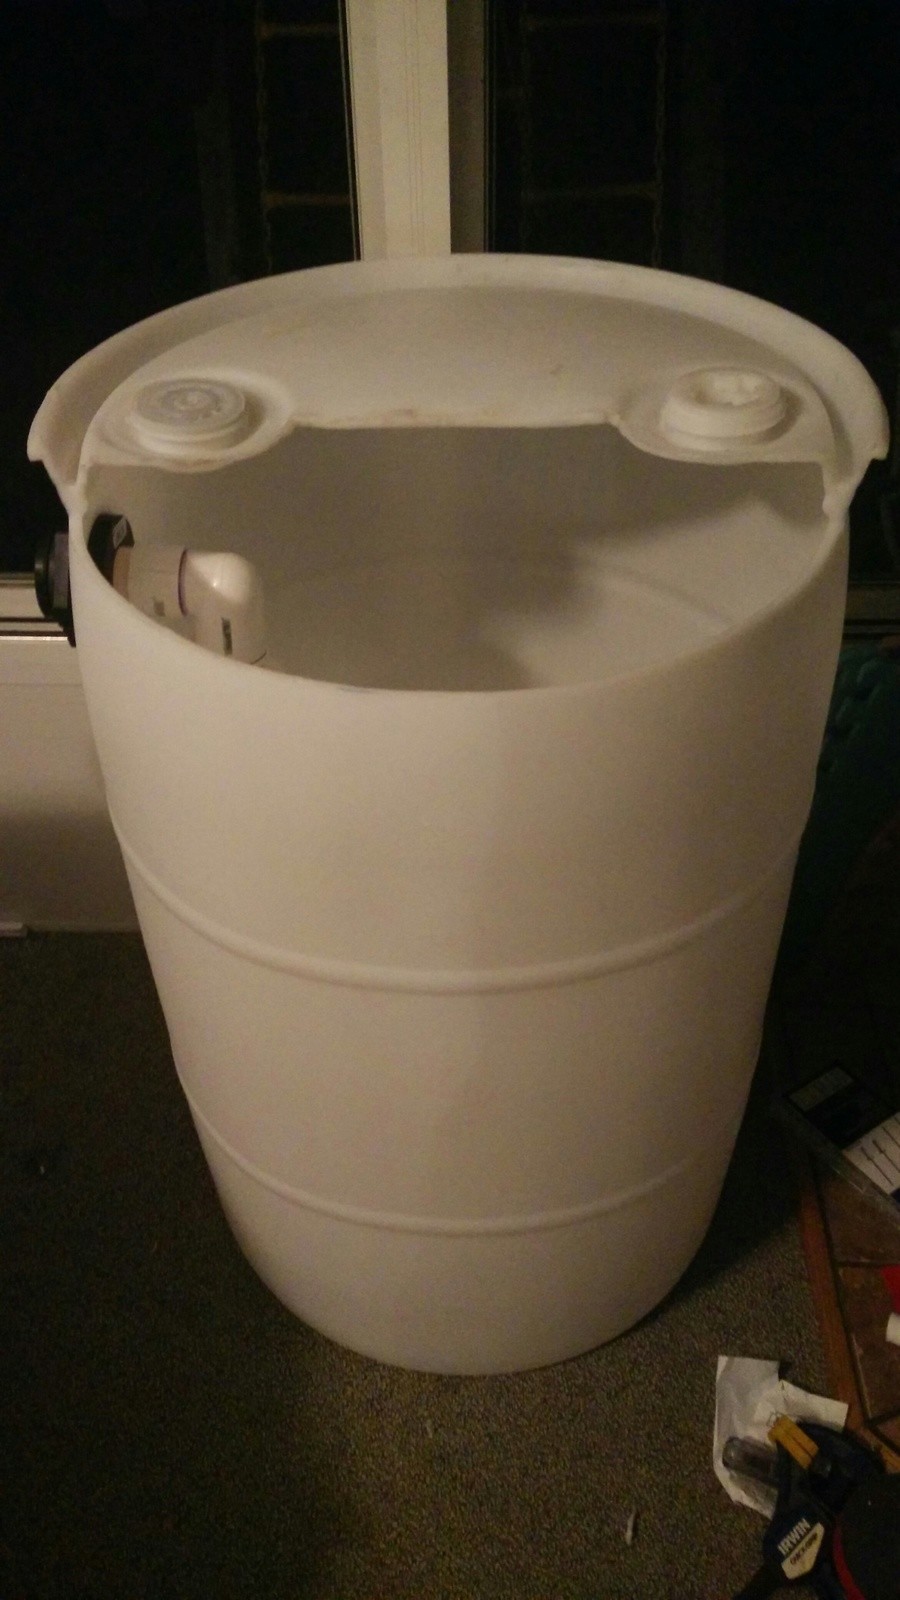
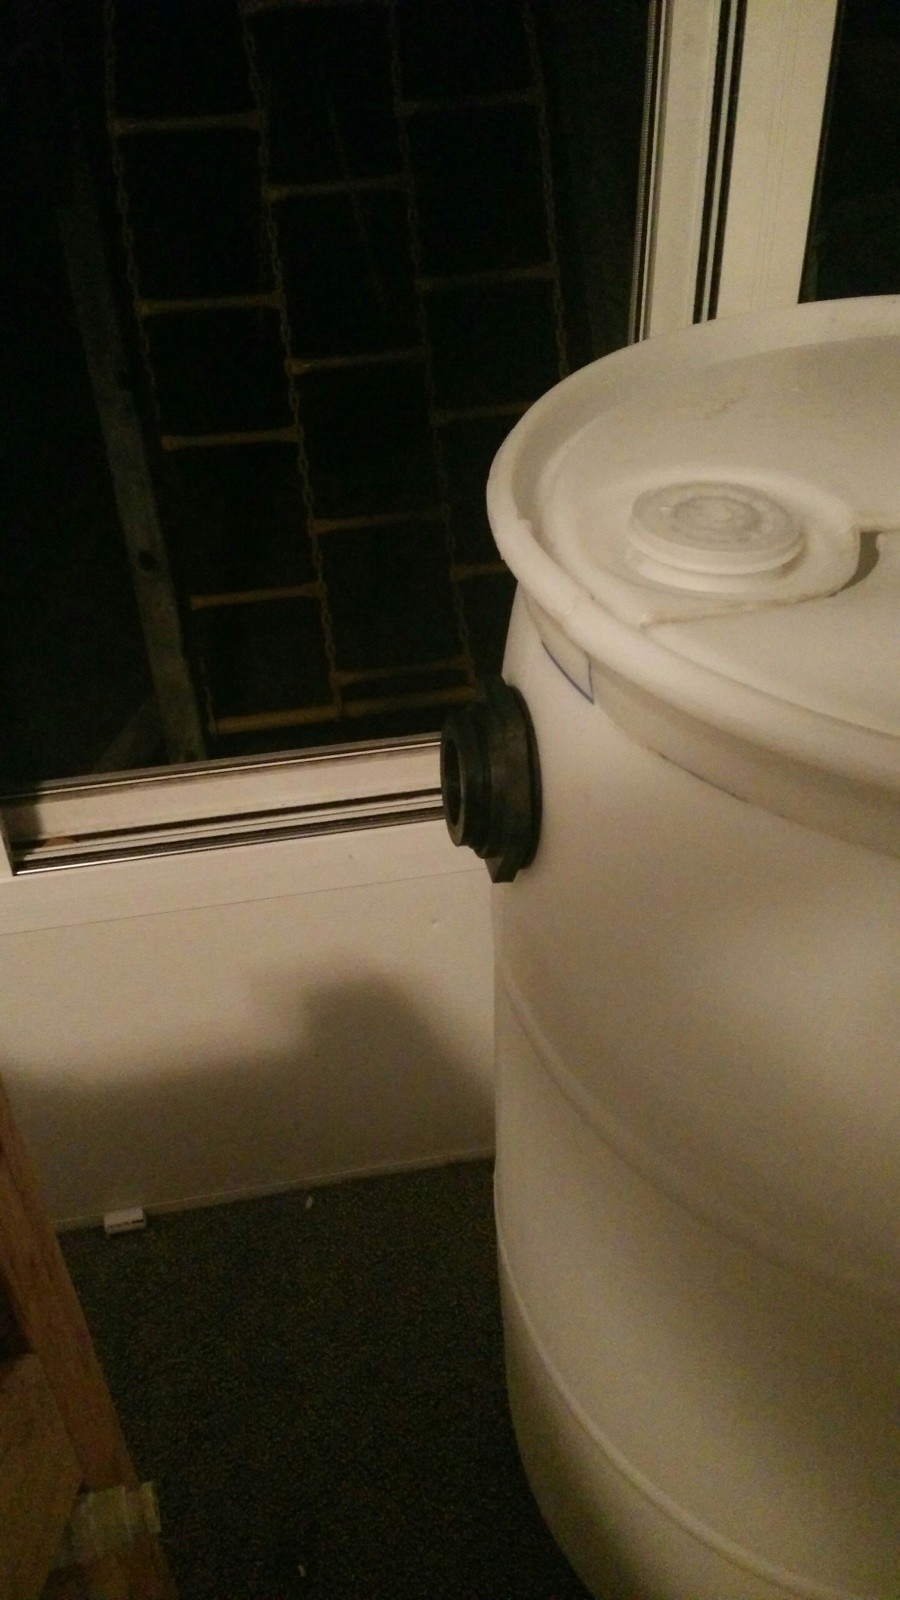
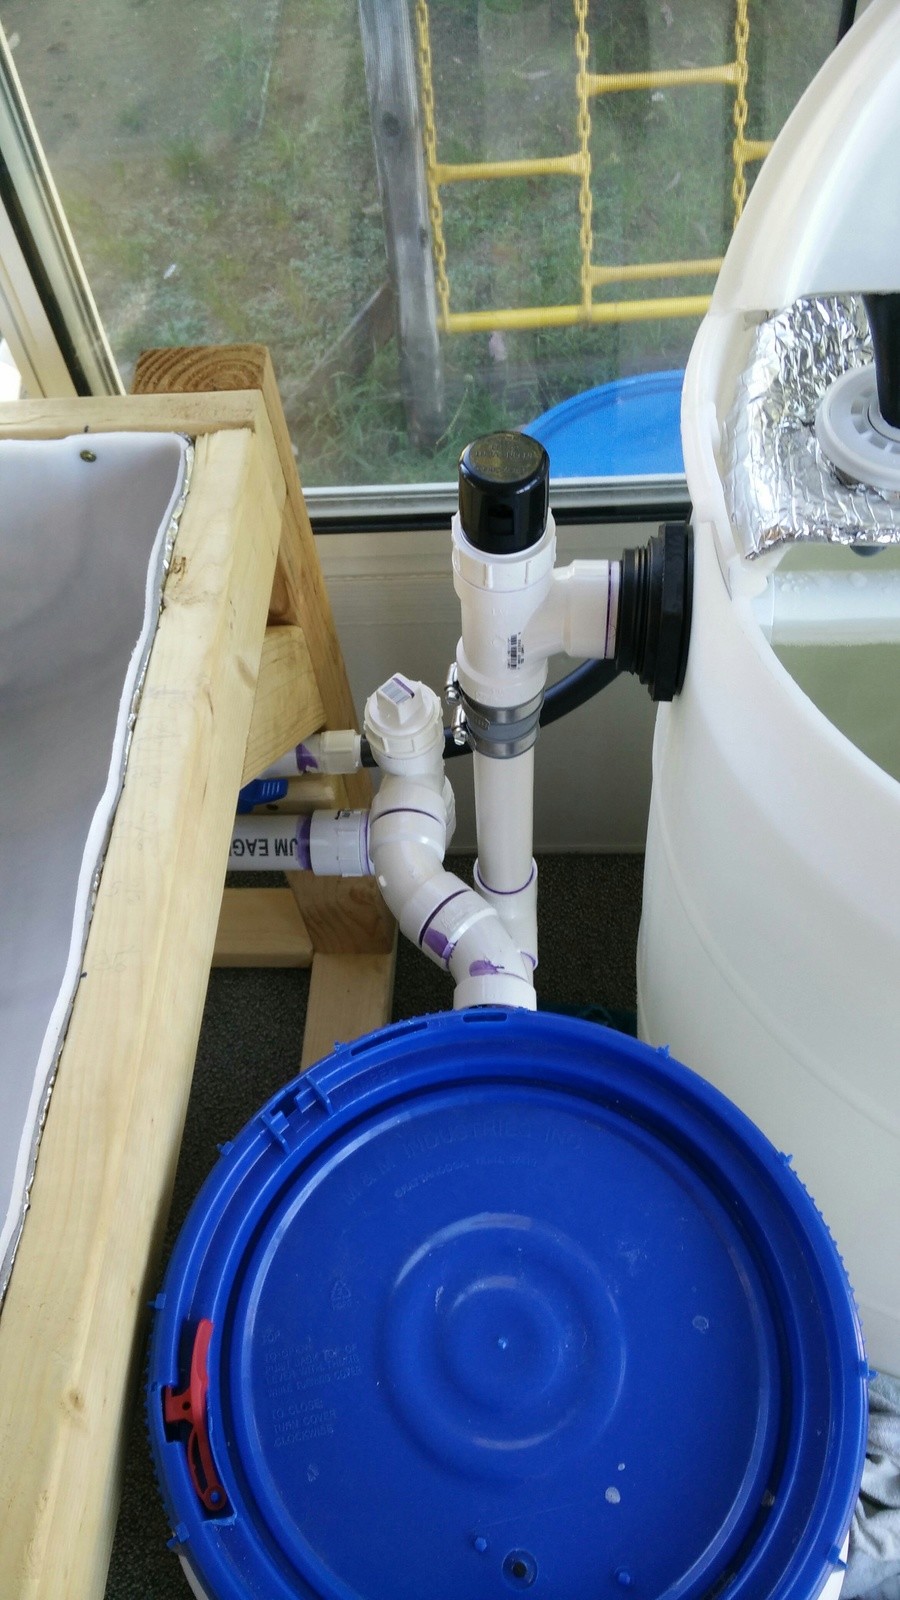
The sump tank is constructed using 55 gallon drums. Although these are done a little differently than the grow beds as far as where I cut them. These were cut at more like a 3/5 instead of directly in half. This was done to make it just slighter higher to hold more water and get less splashing.
The other two 2/5 parts that I cut away I will use as an outdoor soil grow bed next year.
So I have these two parts for my sump tank, and I made it so that I could line up the bungholes and use a 2" threaded union to join the 2 parts together.
I will eventually add that Frost King shit to the sump tank, it's just rather expensive stuff so it can wait.
Now, the more pain in the ass shit to explain, the plumbing underneath.
So, each Bell Siphon drain has it's own 3/4" pipe going to the sump tank.
The emergency drains are a little different. They do not all combine together, but the two on the left two grow beds combine together to a 1.5" PVC pipe and the two on the right two grow beds combine together also to a 1.5" PVC pipe which drains into the sump tank.
In addition, the swirl filter drains into the the 1.5" PVC pipe on the right side. More on the swirl filter later.
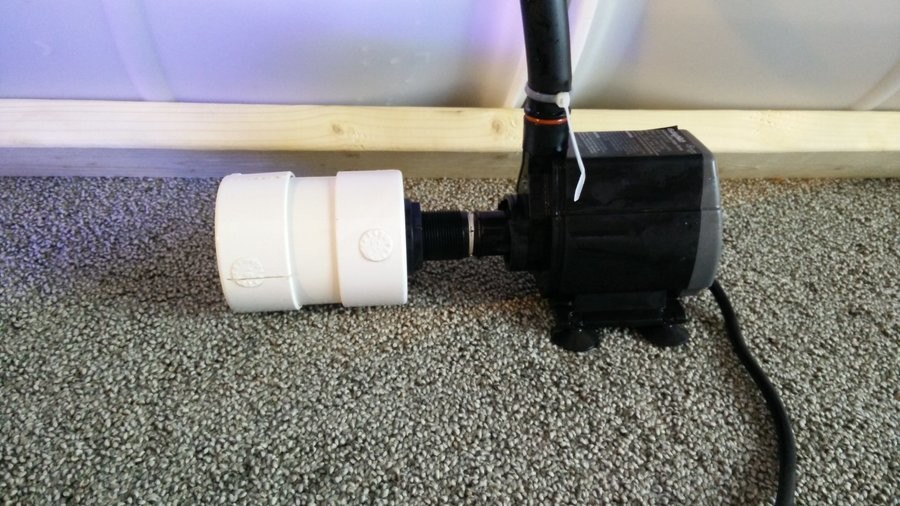
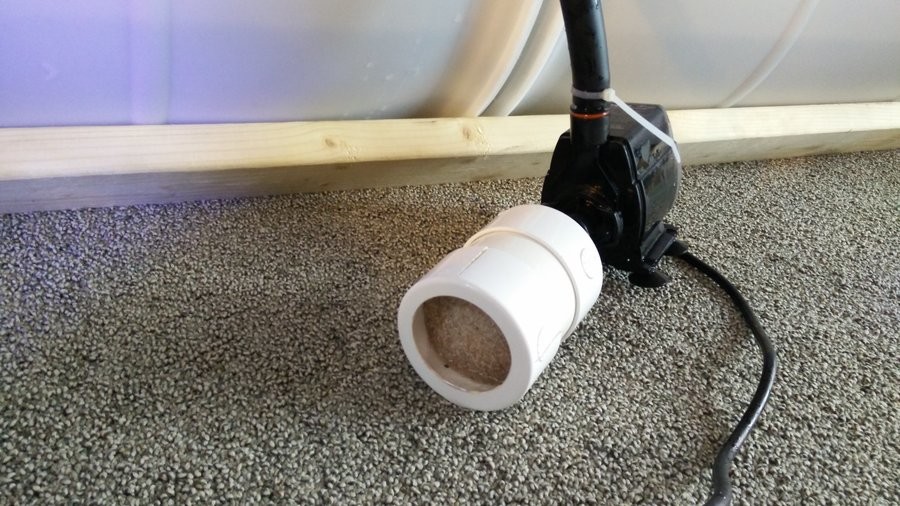
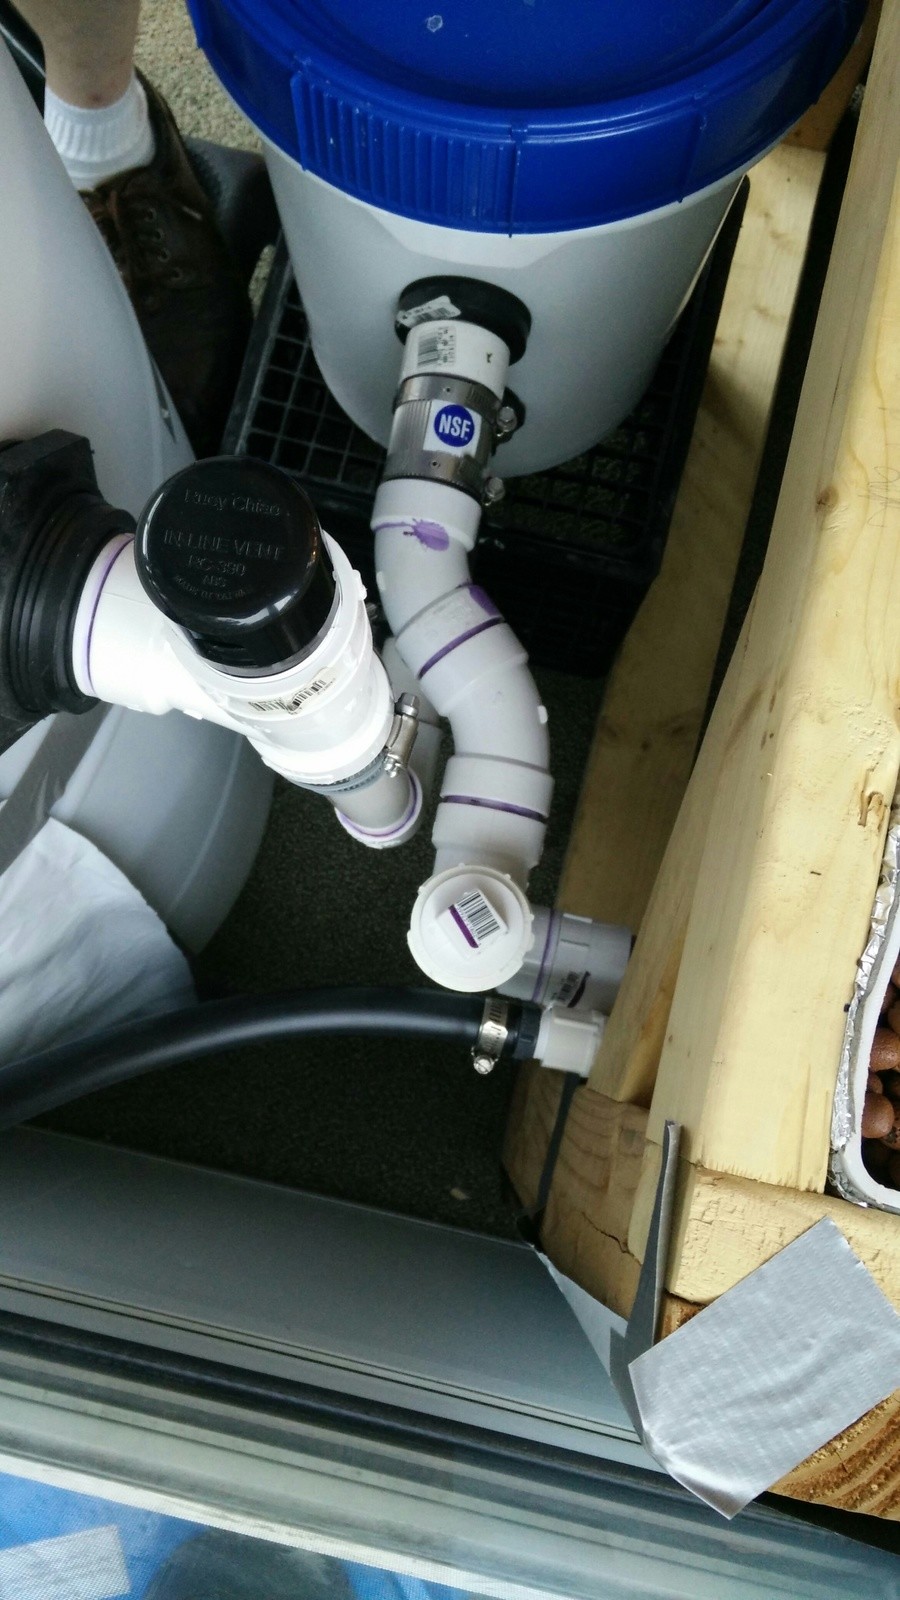
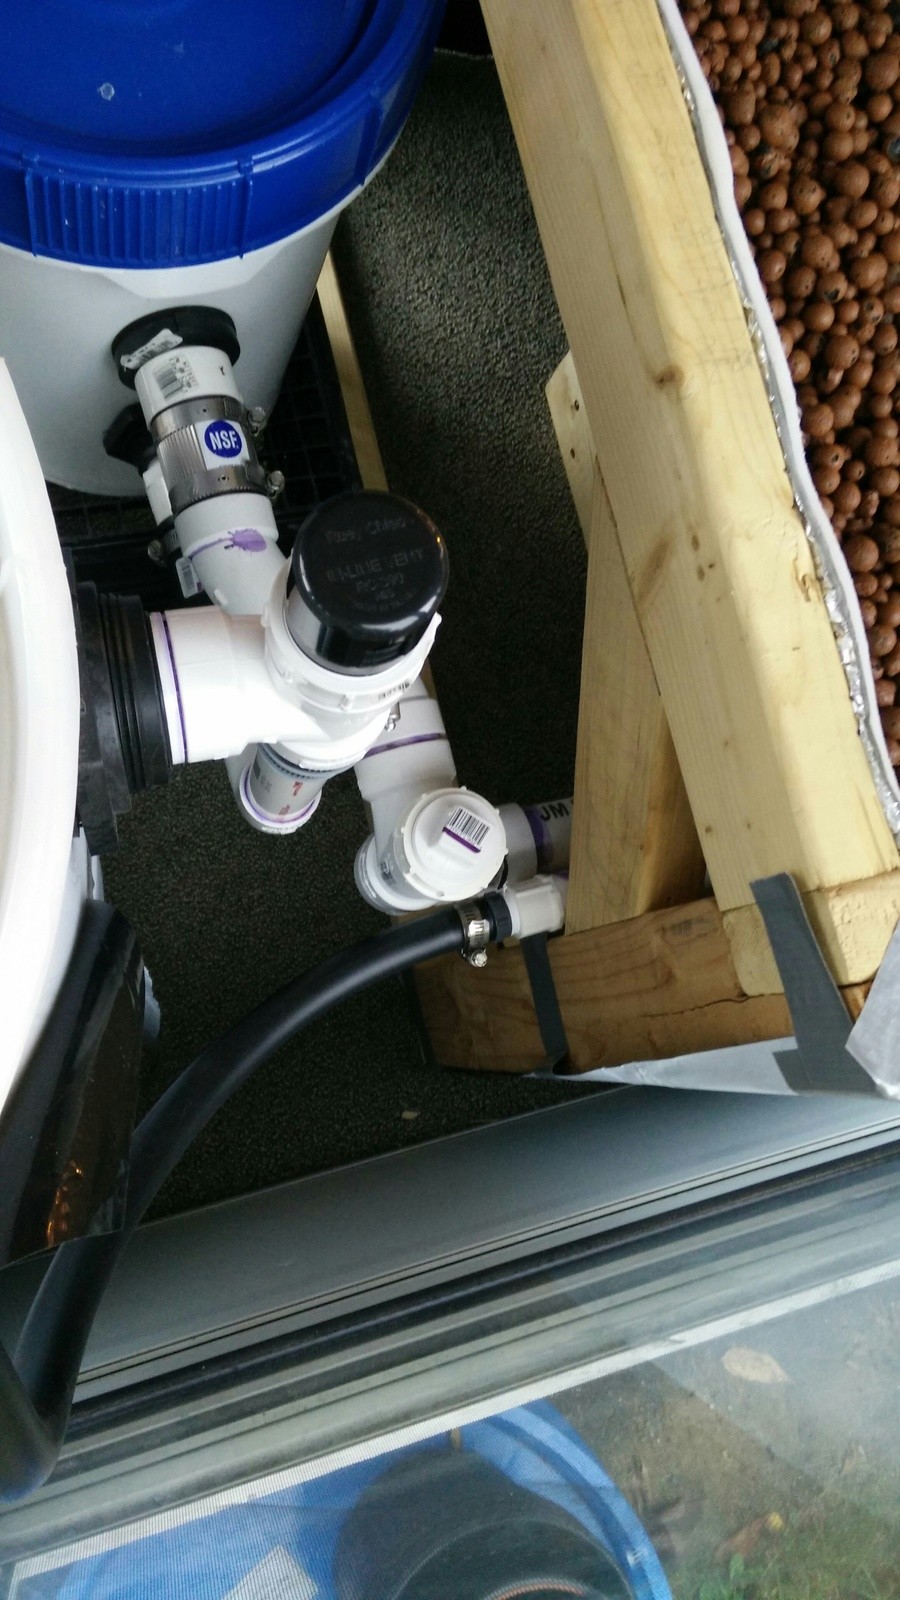
Did you follow that? I'm having a hard time explaining that exactly how I mean it all. The pump is a 1,000 GPH (gallons per hour) pump that can push the liquid up to a height of 12 feet. I chose not to use the housing and filter that came with the pump because I got this idea for my own filter which works great.
The filter I made consists of 3" thin wall PVC drainage pipe. I put a 3" at each end. One cap has a big hole drilled into it, the other cap has a 3/4" bulkhead fitting that attaches to the pump.
This is the neat part of this. My wifes mother works at Walmart, and she just happened to get a bag filled with the center circle pieces of those large buffing pads that they use to buff the floor and they fit perfectly into the 3" PVC drainage pipe. So I am using them as filters that I can easily take out and wash or replace as needed. There are 4 different type of those little circle pads and they filter out different levels of fineness of the debris in the water.
The pump feeds into the 3/4" black tubing which then goes into some 3/4" PVC on the frame. That then branches off to some 1/2" PVC to fill the grow beds. Additionally, it feeds 3/4" black tubing to the fish tank. The Fish Tank is constructed using... you guessed it, a 55 Gallon Drum. I cut out part of the top to make a lid and attached that using a piece of piano hinge. Water flows in through the 3/4" black tubing and an elbow to make it splash more, adding more dissolved oxygen to the water and also helps and a little swirling effect to the liquid in the tank.
I installed a 1.5" bulkhead fitting near the top for the drain. The drain pipe itself reaches to the bottom of the tank to help pick up the fish waste. I made a little guard out of a 3" PVC cap to prevent fish from getting sucked up into the drain, which had happened before I added the guard. A shitload of holes are drilled into the cap/guard. The 1.5" drain from the fish tank gets reduced to 1.25" from a rubber reducing coupling. I used that so the fish tank and the swirl filter can be removed from the system. I actually use 3 of these rubber couplings so all of that can be separated.
The 1.25" pipe goes through a 1.25" bulk head fitting into the 5 gallon bucket which acts as the swirl filter. The inlets gets reduced further to 3/4" and then it goes through an elbow so that the flow going it causes the liquid to be spinning in the bucket so the solid matter stays towards the middle.
The cleaner water goes upwards through a 1.25" drain. The drain is the elbow facing upwards. That drain goes through a 1.25" bulkhead fitting. From there the drain of the swirl filters returns to the sump tank via that 1.5" PVC pipe that the 2 right most grow bed emergency drains are also connected to.
On the front of the swirl filter I have a 3/4" bulkhead fitting with a spigot on the outside. On the inside there is a 3/4" PVC pipe and elbow that goes to the bottom center of the bucket. When I open the spigot it will cause the solid matter to get sucked up and out. I can then use that dirty water for my plants outside.
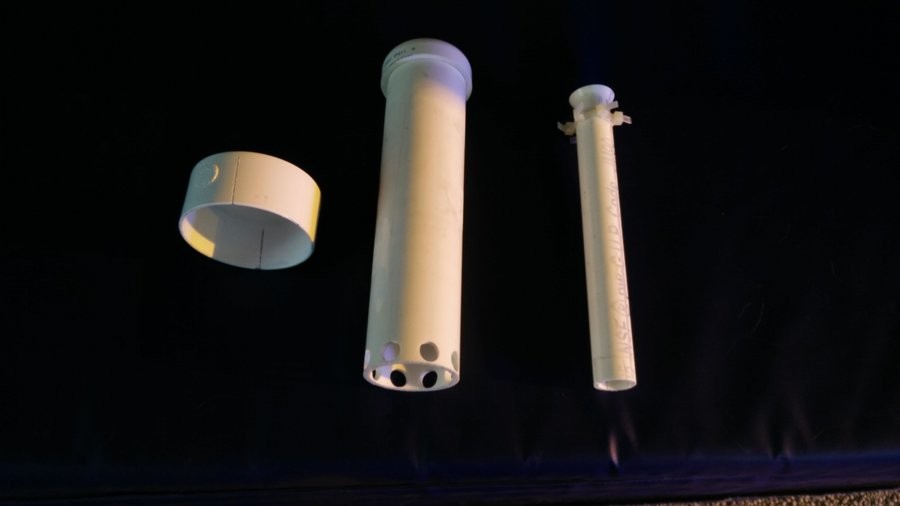
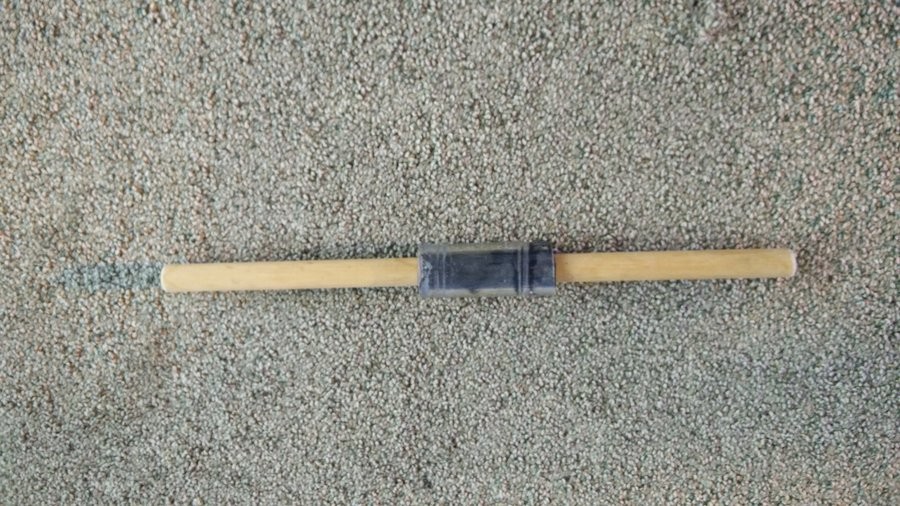
The bell siphon has a few parts to it to get it to work correctly. Outer 3" thin wall drainage PVC with slots cut in it. Acts as a media guard to keep the clay pellets and roots out of the rest of the siphon. 2" PVC and cap that acts as the bell. 3/4" PVC that I flared out the top, and that acts as the stand pipe.
I put some zip ties on the stand pipe to make it so it is centered inside of the bell pipe.
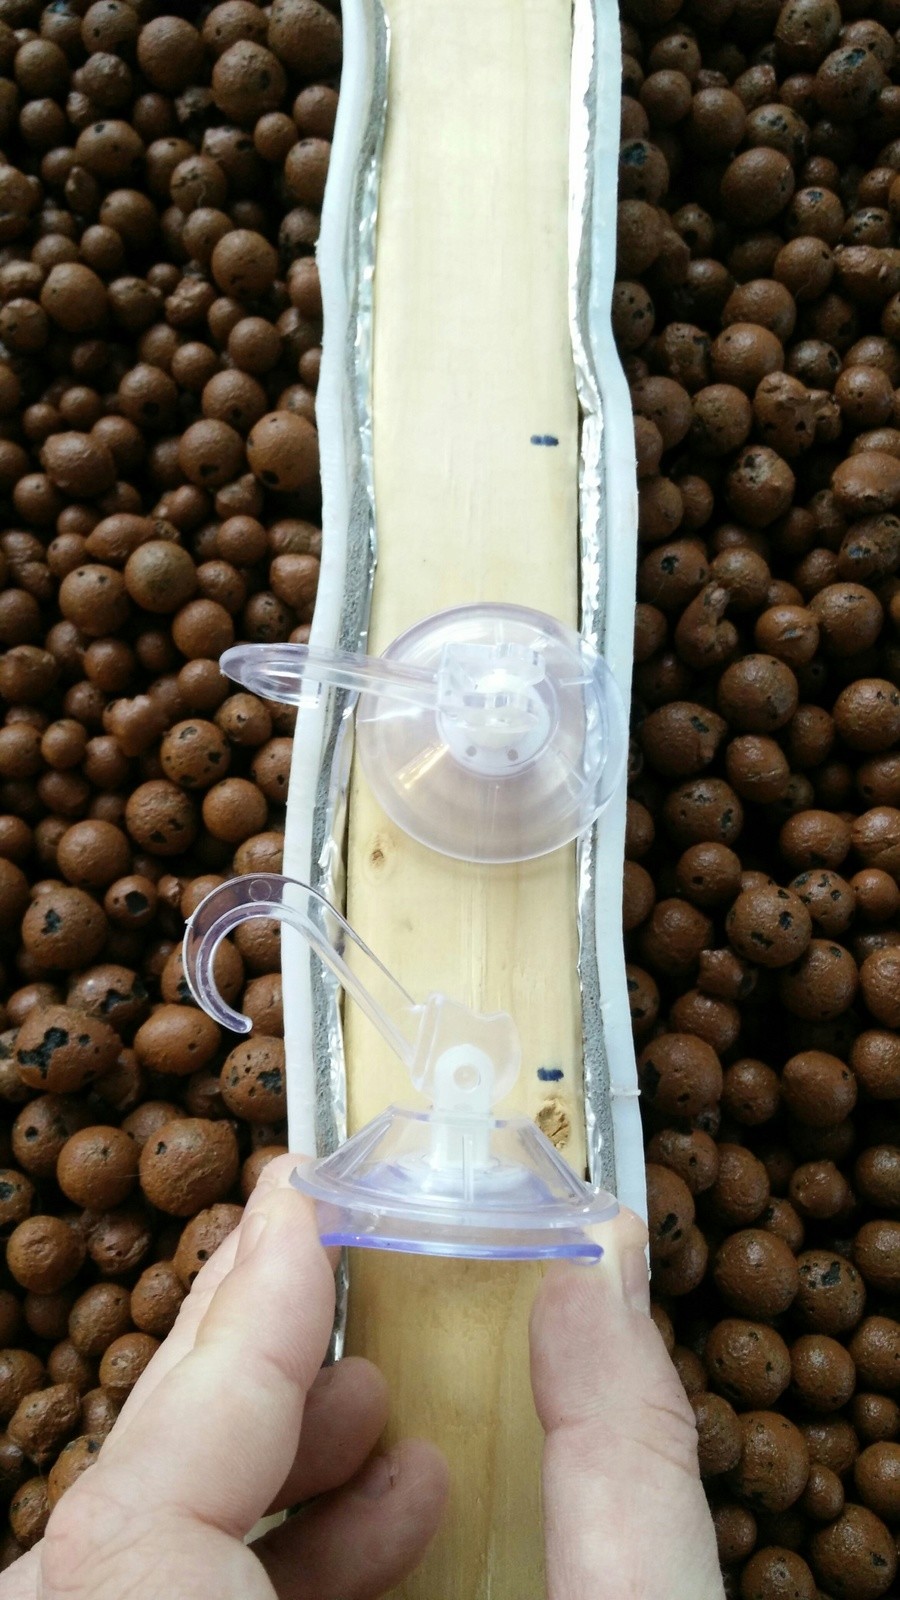
This is the little tool I made to help me put the bell siphon together. I use these suction cups to take apart the bell siphon when I need to inspect it. I will make something a little better when I come up with a good idea of how I want to do it.
This is a video of the bell siphon draining one of the grow beds. Works quite nicely.
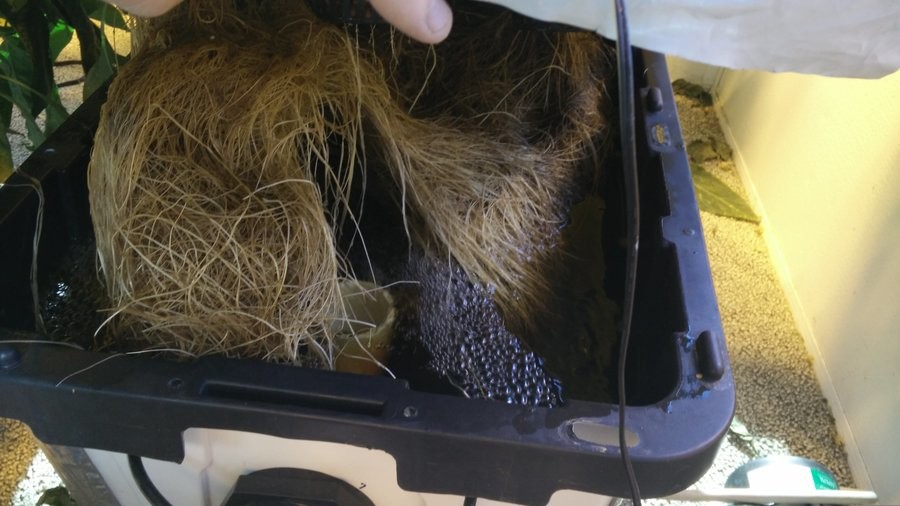
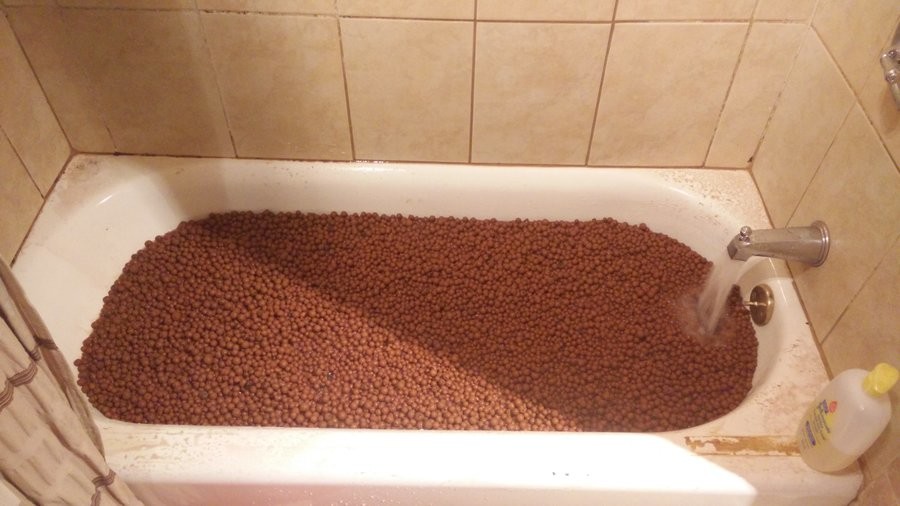
The grow beds are filled with Hydroton brand expanded clay pellets. They take up about 2/3 of the total volume inside the grow beds, the liquid takes up the other 1/3. I calculated that with the grow beds full of water and clay pellets it is over 1,300 lbs.
I had to wash the dust off of the clay pellets first which was a pain in the ass so I did it in my bath tub. My wife wasn't too pleased about that.
Well folks. So that was a lot of the details of this grow system. I have made it so I can expand on it and eventually add vertical grow tubes and whatever else I want.
I hope you all enjoyed this. It was fun putting it all together. It took me about 2 months, about $2k - $3k usd, and like a hundred trips to Home Depot, Lowes, and many hydro stores to find exactly what I needed to put this all together.
Joined: Mar 3rd, '16, 08:46 Posts: 977 Gender: Are you human?: grudgingly
Location: Canberra, Australia
Looks nice! You've obviously put a lot of thought and research into this. (Oh man, clay pellets in the bath tub! That's a new twist to the ever-present forum discussions on washing media...)
Joined: Jul 6th, '14, 20:25 Posts: 3854 Location: 2.2 kilometers up, NM, USA Gender: Are you human?: Series of particles
Location: Sapello, New Mexico USA
Very good looking system. Thanks for sharing the details in detail, lol.
Joined: Jul 11th, '16, 01:57 Posts: 9 Gender: Are you human?: Yes
Location: Massachusetts, USA
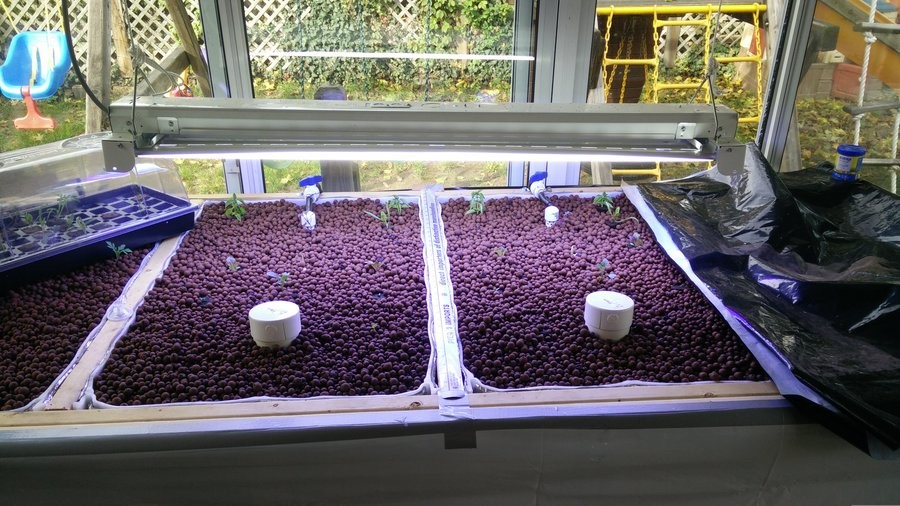
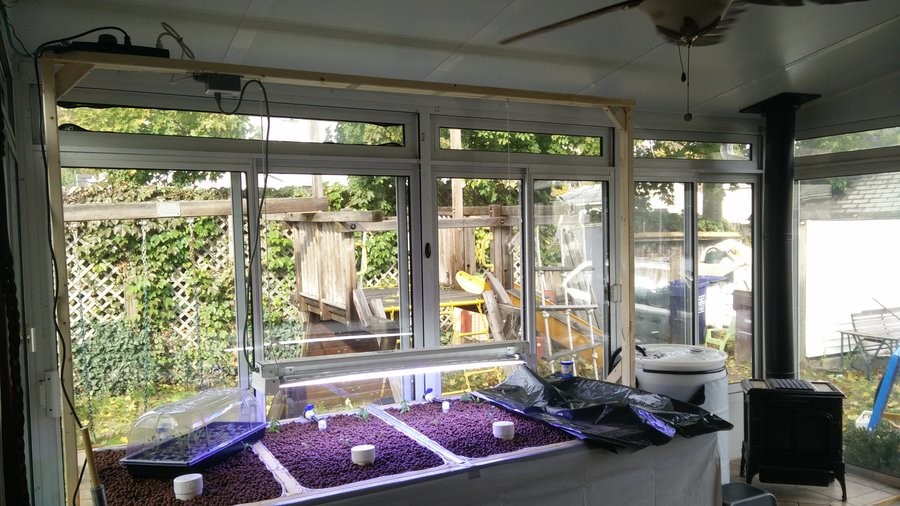
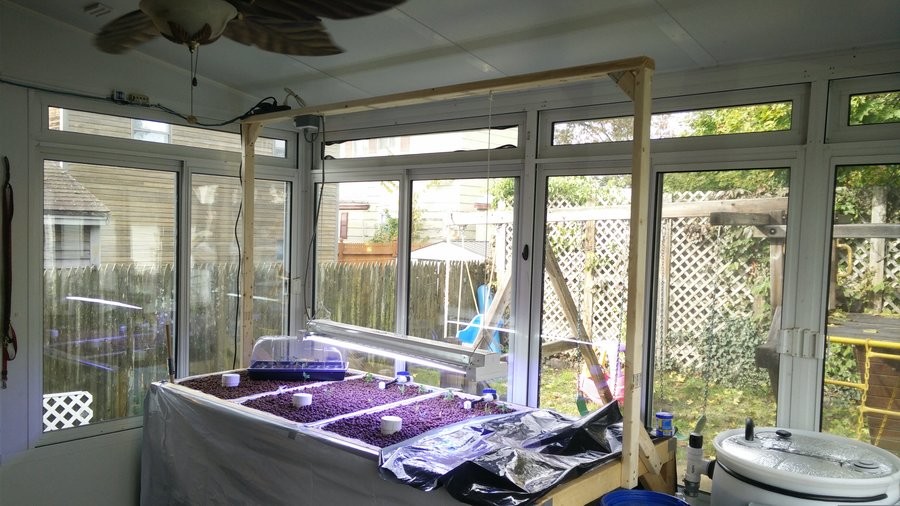
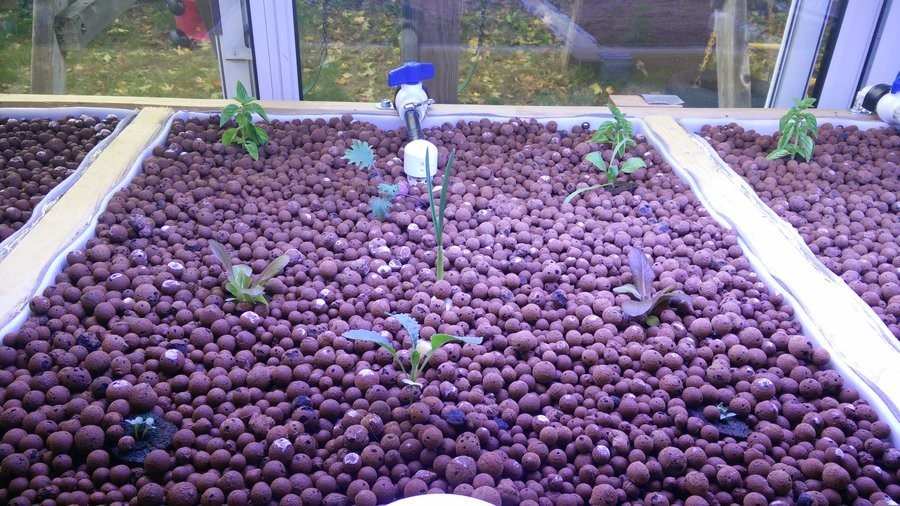
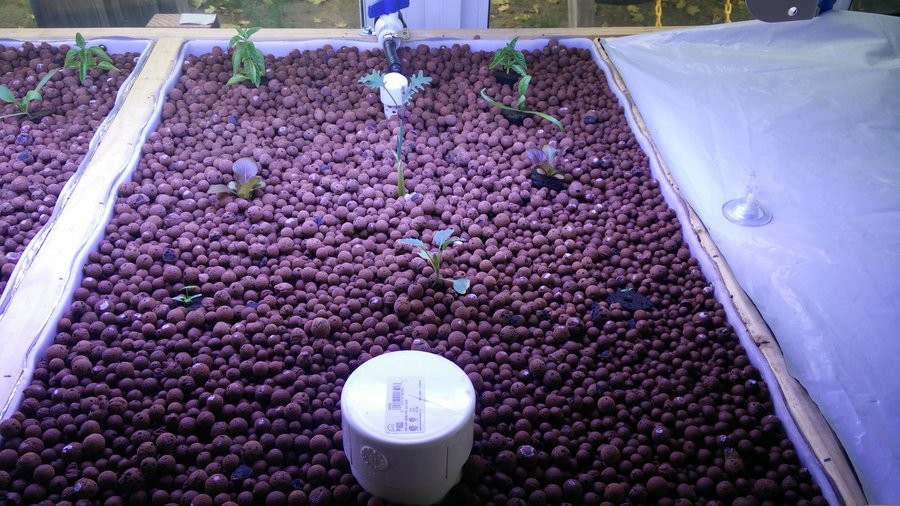
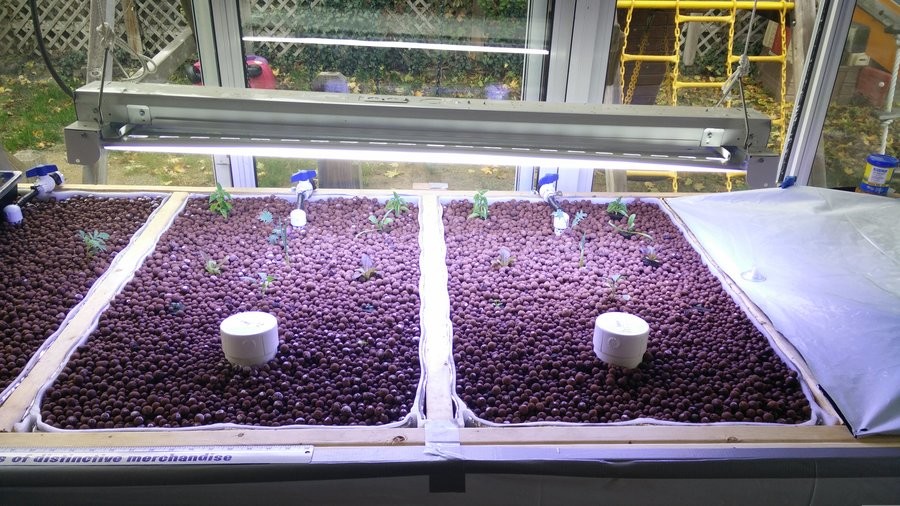
Just wanted to give you guys a quick update. I added red wiggler worms to the grow beds. I didn't have enough clay pebbles to completely fill all the grow beds so one is covered to prevent algae since water is rising to the top of the clay pebbles in that grow bed.
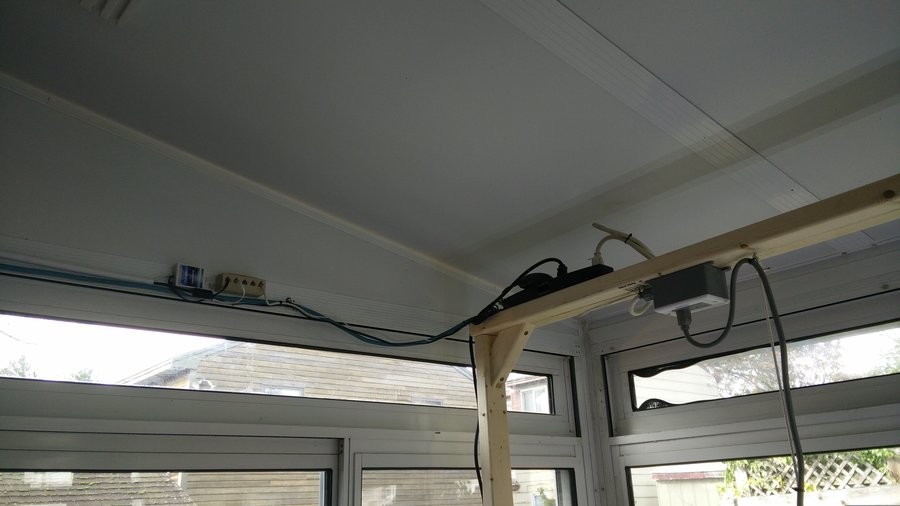
I also made a temporary stand to hang lights from. I plan to eventually make something out of aluminum square tubing, but this works great for now.
Finally, I added some plants to the system. Currently in the system there it basil, garlic, spinach, romaine lettuce, marigolds, parsley, sage, kale, and rosemary. So far everything is going smoothly. The plants have been in the system for only a few days and they are showing some good growth and great signs of adapting quickly to it. The basil plants are some clones that I cut off another plant.
I am going to be picking up another 400 watt HID setup for some short money off of craigslist. But I also now just remembered of a police confiscation auction site that sells lots of grow stuff so I should also check that shit out too.
Joined: Aug 26th, '10, 07:17 Posts: 9104 Gender: Are you human?: YES
Location: Oregon, USA
I don't know if you'll ever need it but if you decide you need a prefilter for your filter, putting the whole thing in a sock would work (might have to hold the sock away from the filter entrance a bit though).
Joined: Jul 11th, '16, 01:57 Posts: 9 Gender: Are you human?: Yes
Location: Massachusetts, USA
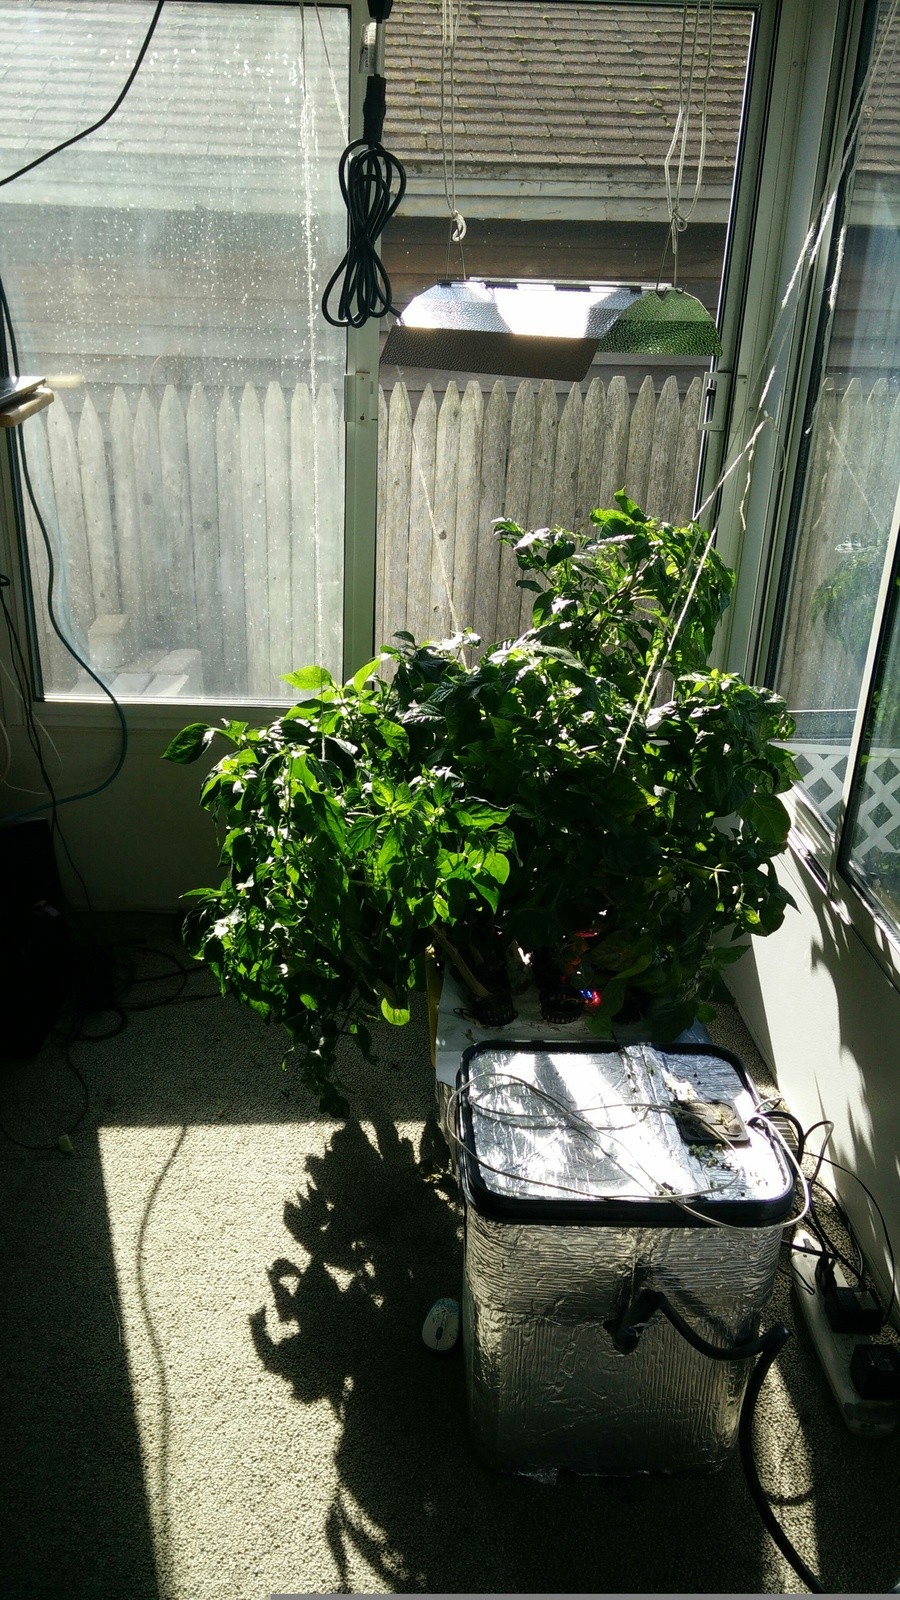
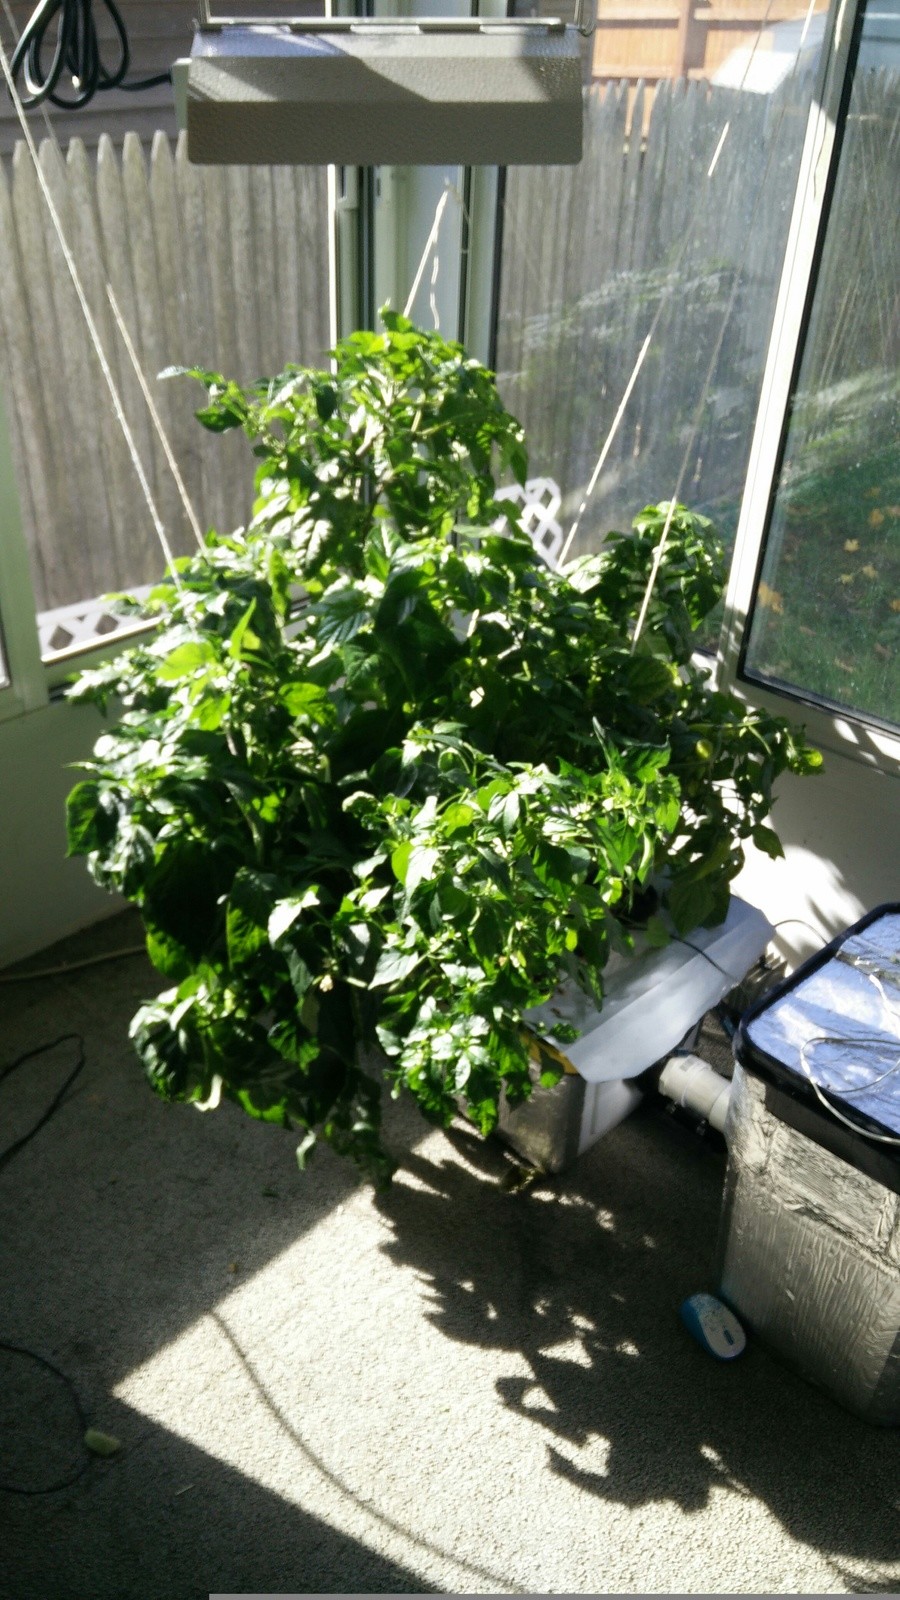
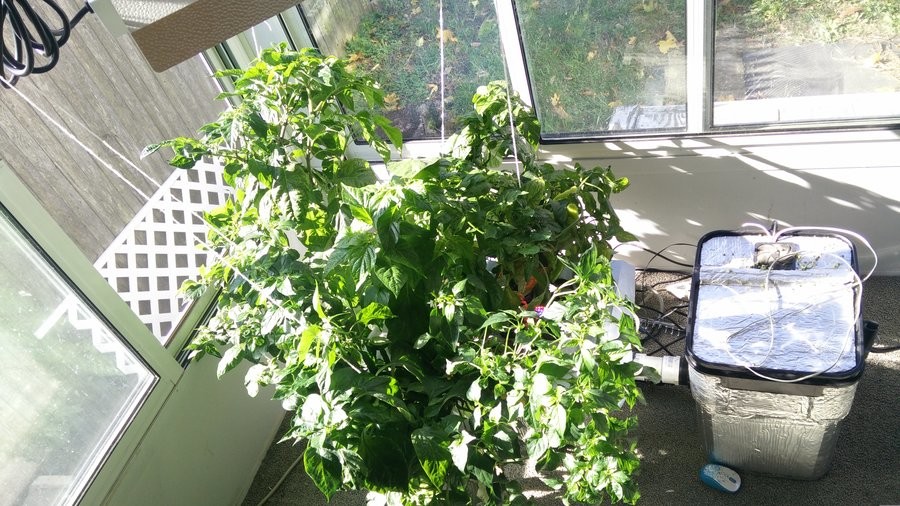
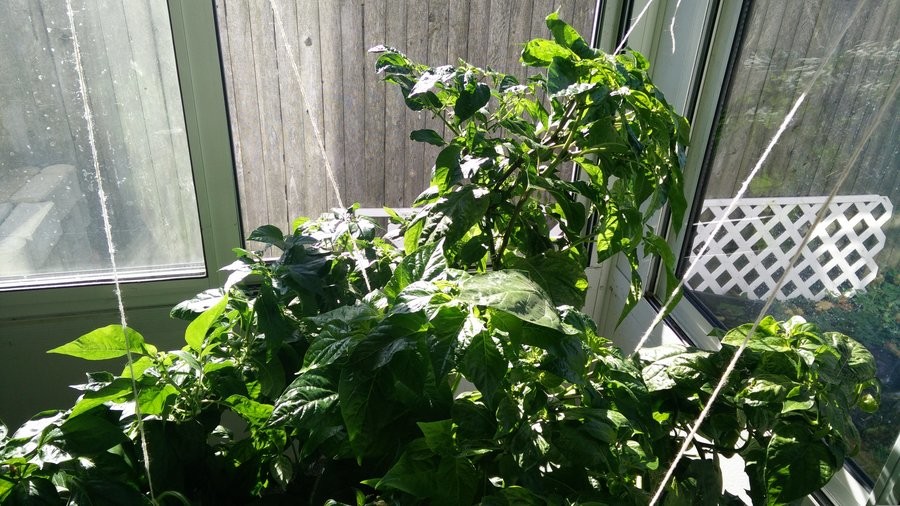
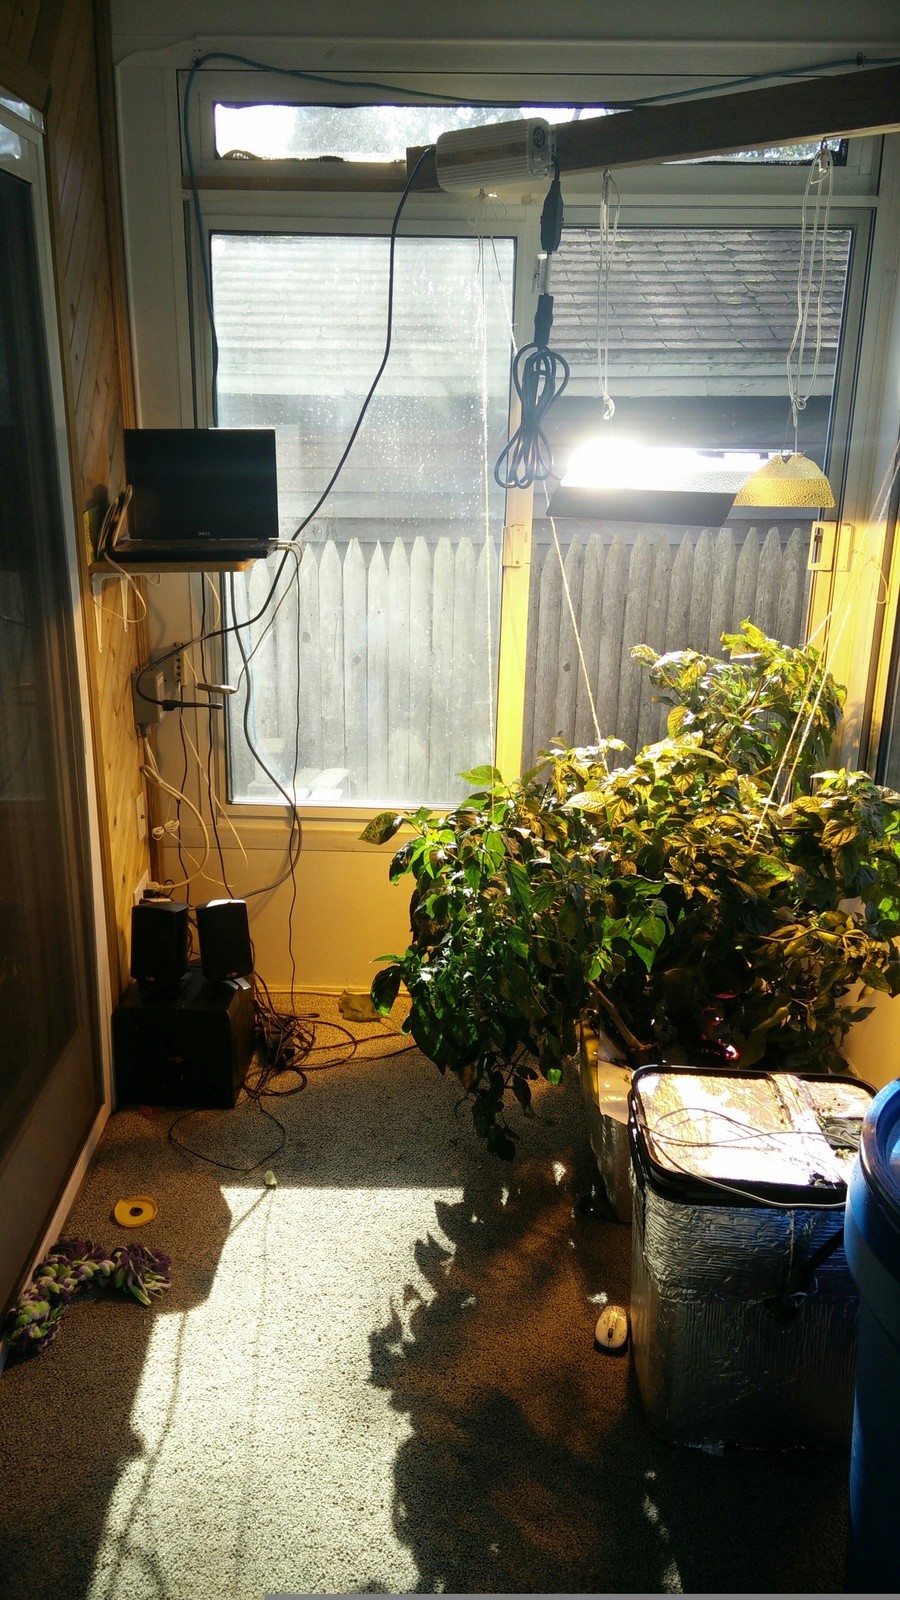
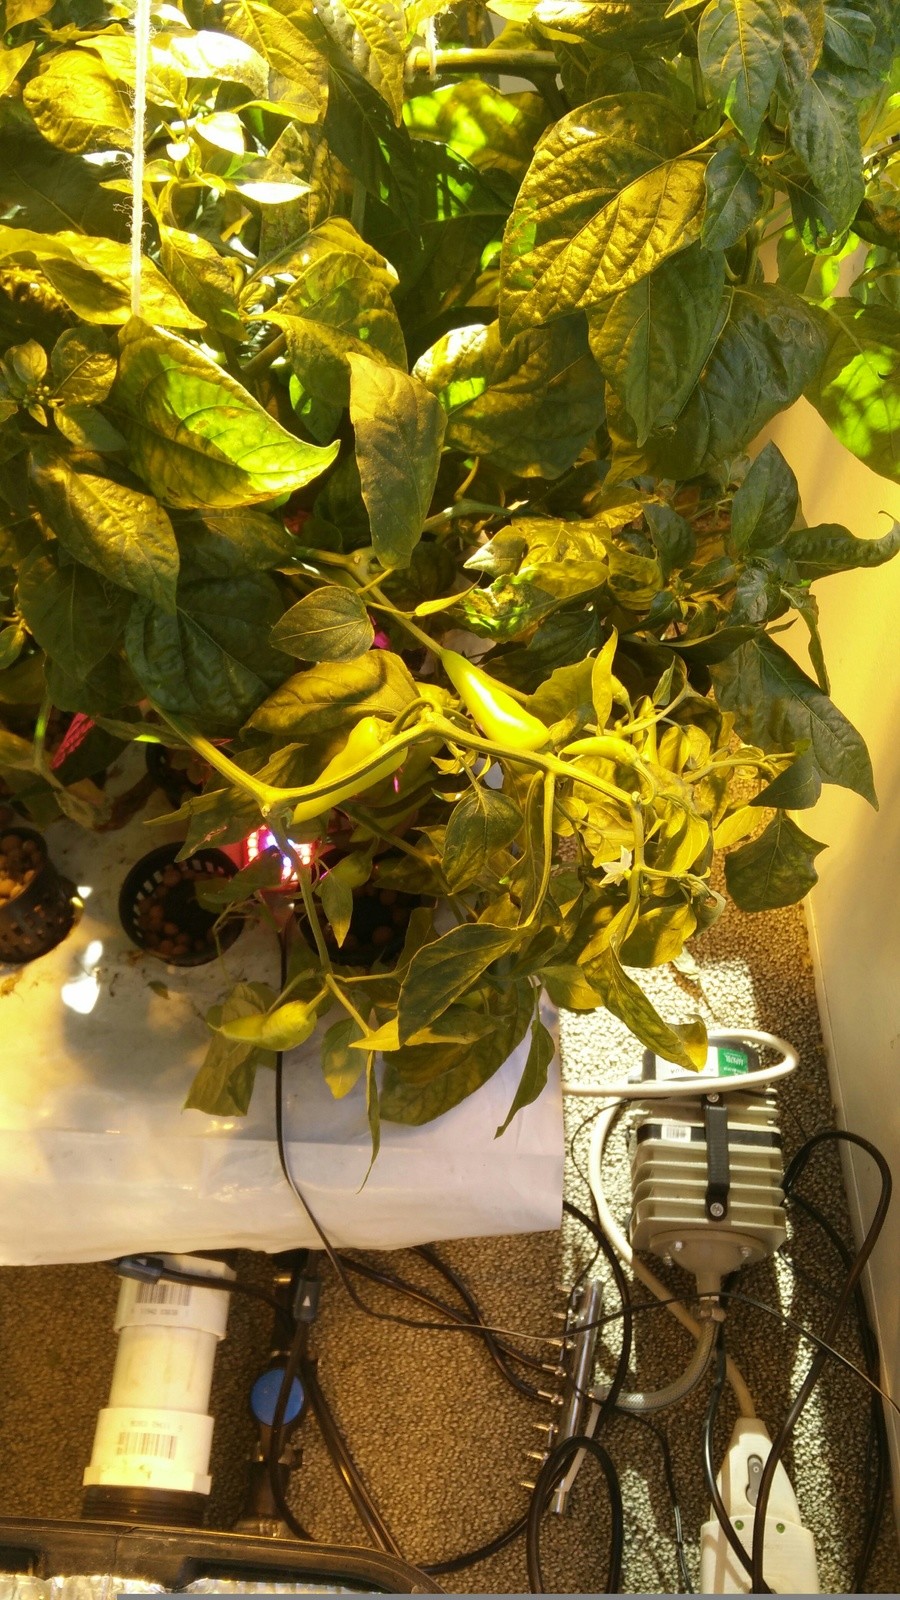
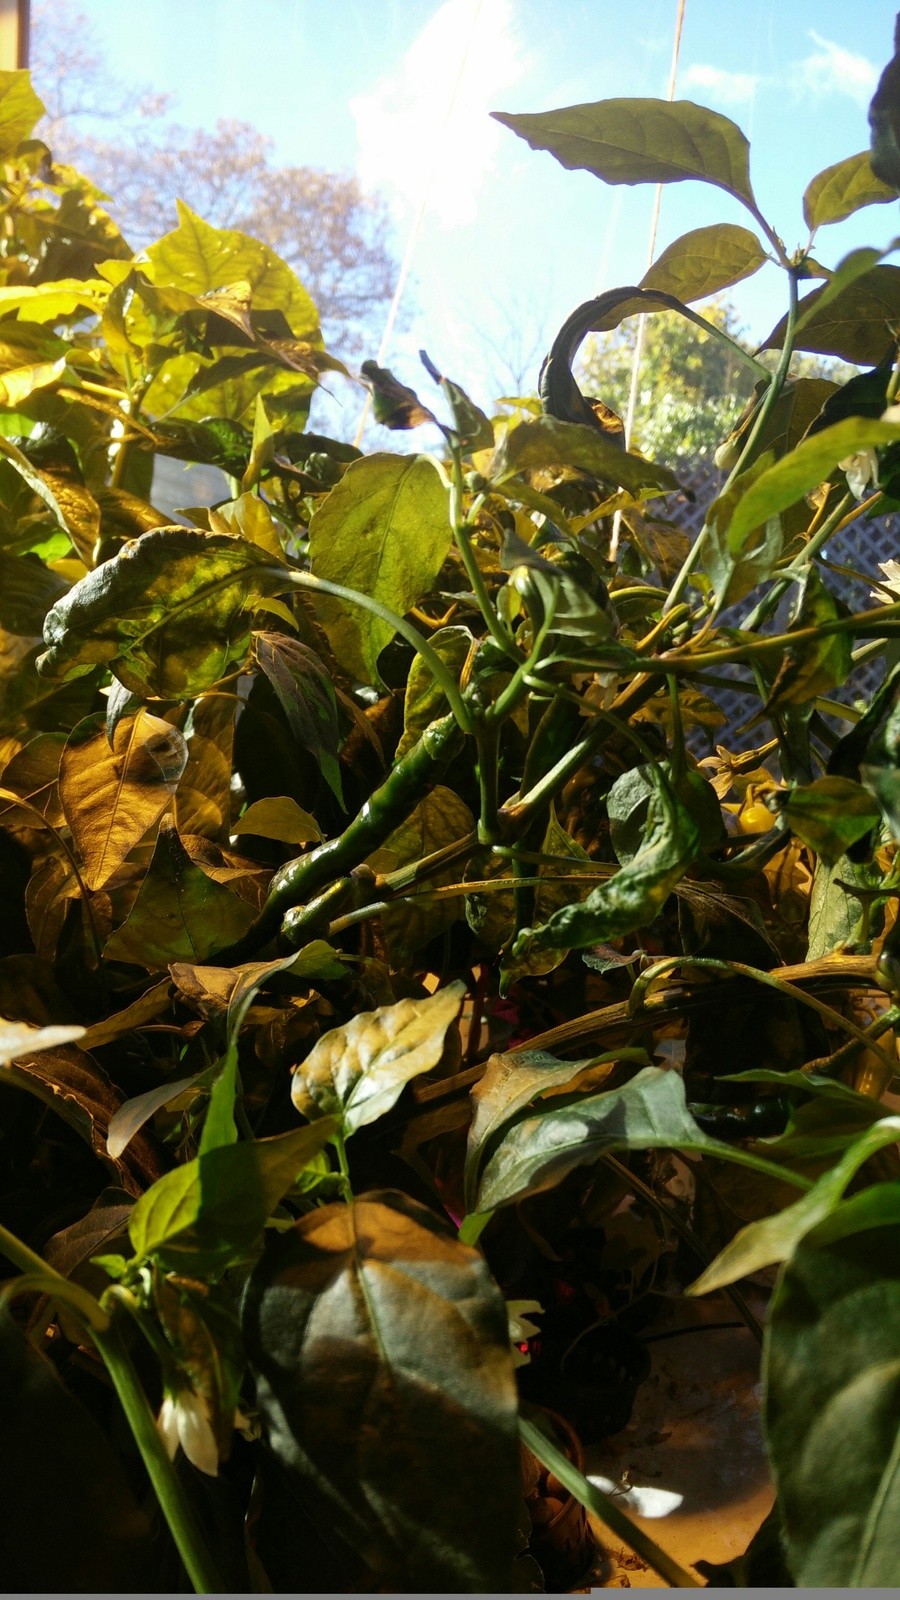
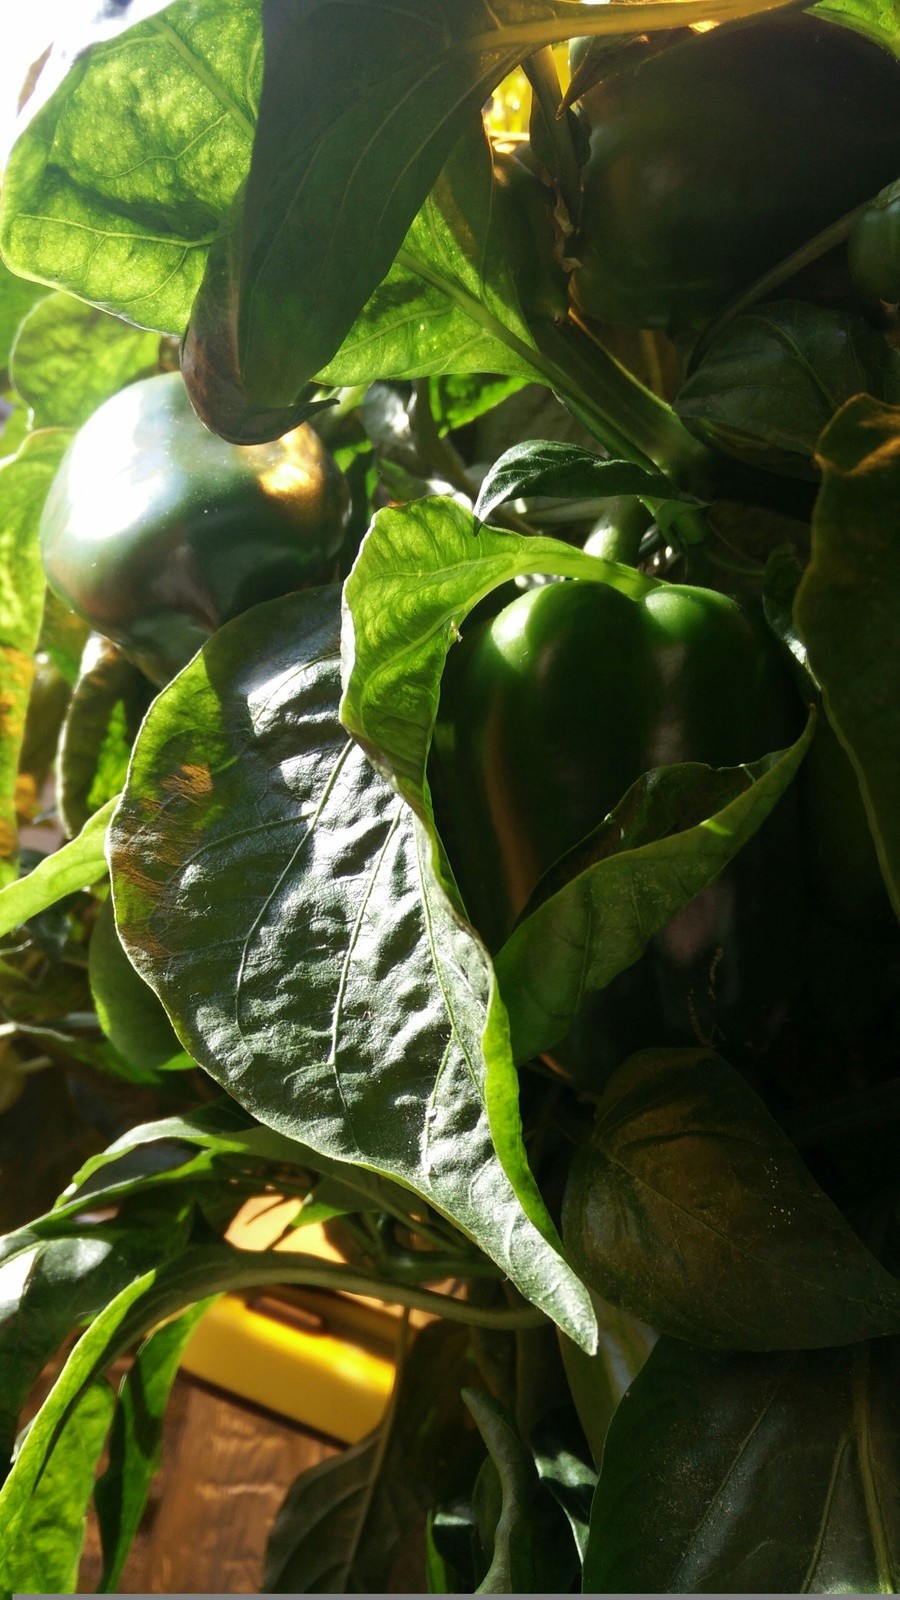
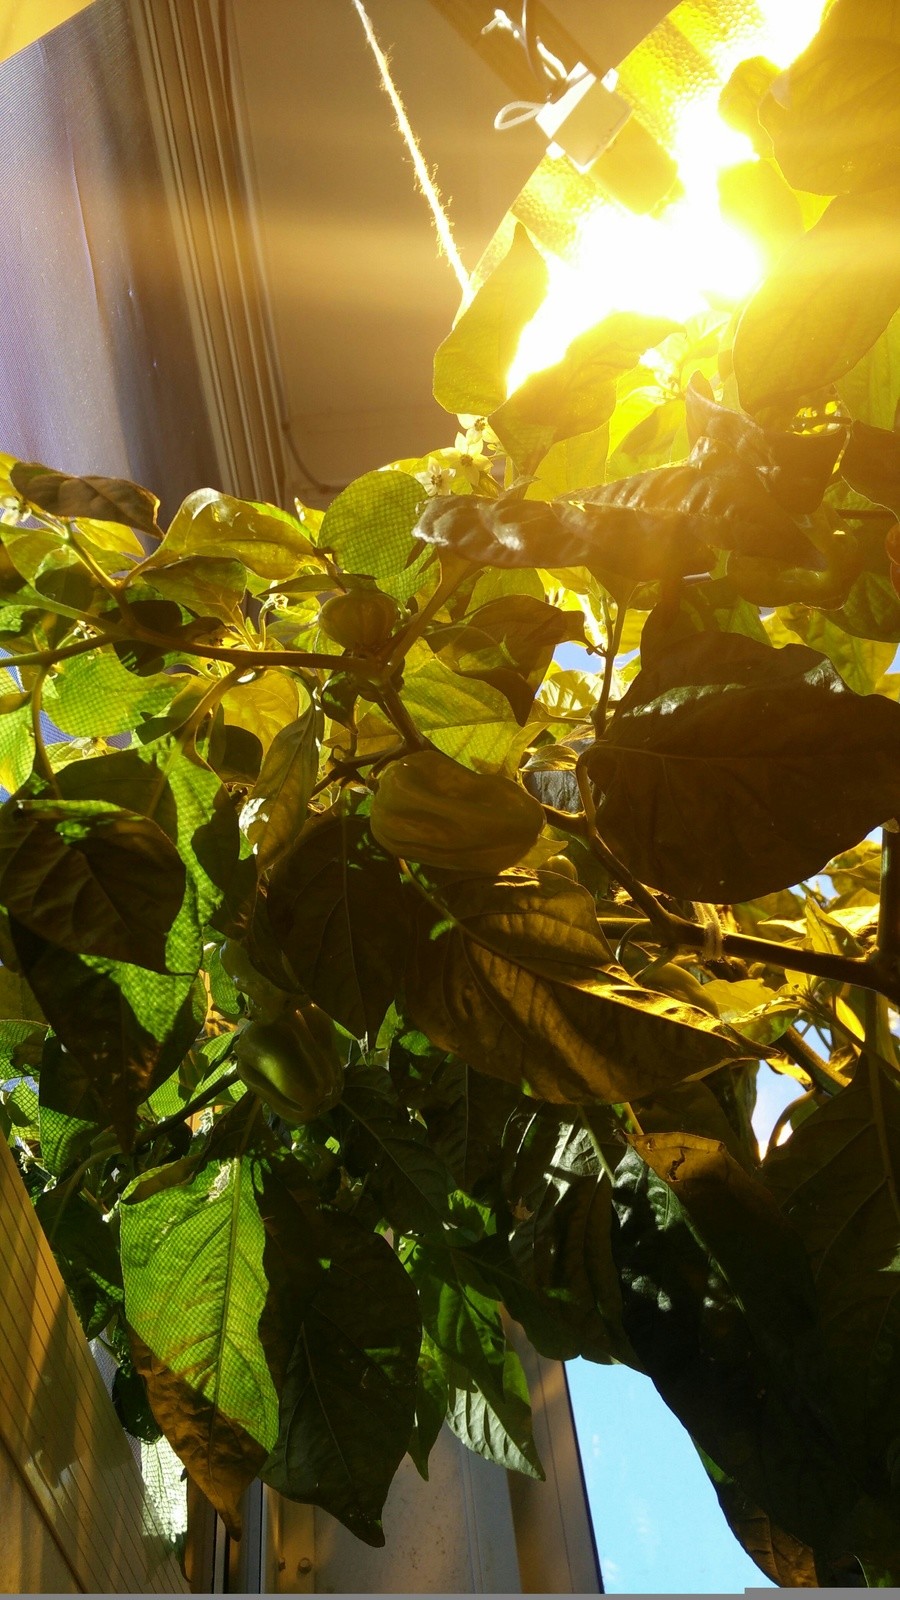
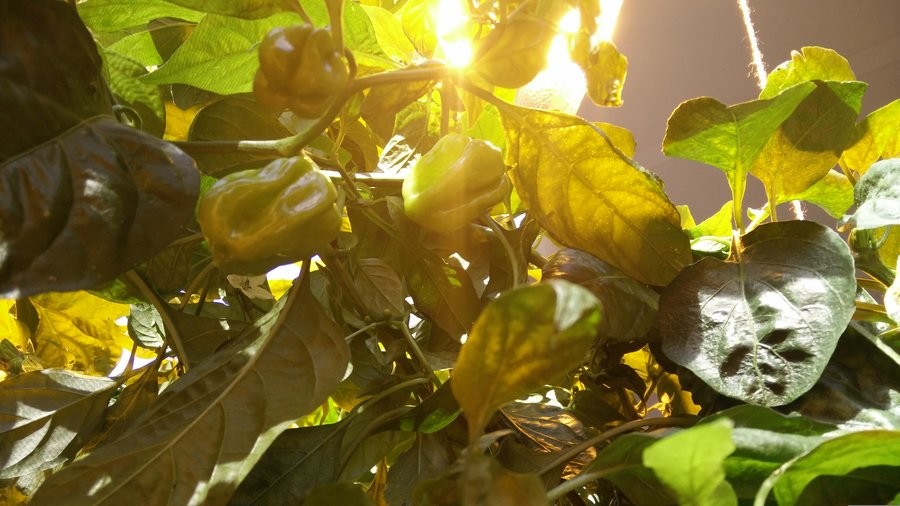
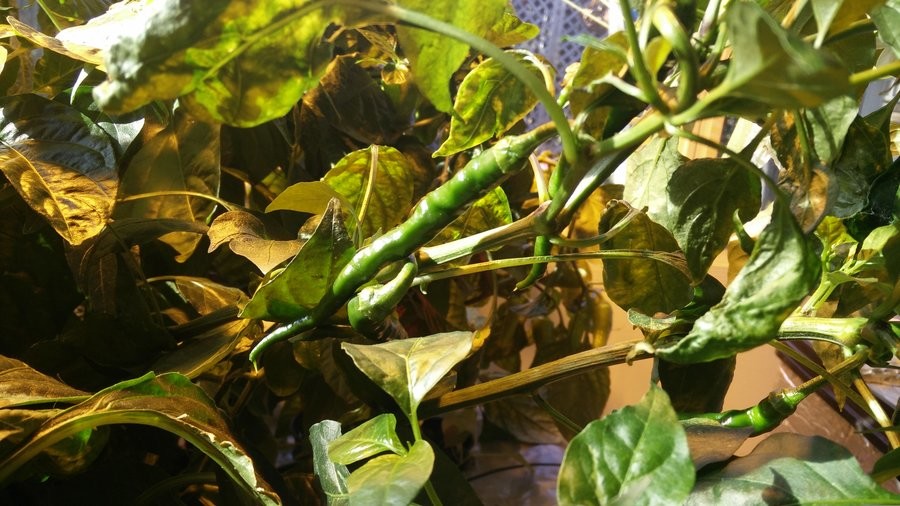
This is my hydroponincs system that I made back in june. I currently have 4 different types of pepper plants growing in here, plus also some morning glories and sweet pees just to have some pretty flowers growing in it also.
The light is a 400 watt HPS running on a digital ballast.
I did have some cucumbers growing in here for a bit but I had to kill them off because of an infestation. I did get quite a few good cucumbers from them, but I didn't really have enough light at that time to keep them healthy.
You cannot post new topics in this forum You cannot reply to topics in this forum You cannot edit your posts in this forum You cannot delete your posts in this forum You cannot post attachments in this forum


 That's a new twist to the ever-present forum discussions on washing media...)